Showing posts with label DIY. Show all posts

Wednesday, October 5, 2011

Feeding the Sun Corals

I've had my Sun Coral for over a week, and I they haven't come out much, even during feedings. I've tried a few things, but it seems that feeding them is a nice way of enticing (bribing) them to come out.

After some research, I found a useful trick: cover the coral to allow them to feed undisturbed. The instructions recommended a 2-liter bottle top, but since my frag is still pretty small, I used the top off a small water bottle. I cut the bottle about 1.5" below the neck, peeled off the label, and gave it a good rinse with warm water. I made a small hole in the lid, but decided it was unnecessary after the first try...

I put this top over the Sun Coral and added some frozen Mysis Shrimp. Within a few minutes, I saw some polyp extension, but most heads stayed half way in or more. I left the bottle cover in the tank for about 30 minutes, and then I removed it.

On try number two, I removed the cap. This time I tried some cyclopeze. I left the bottle top in the tank for several hours. Success! The heads all popped out!!

I'll keep my fingers crossed, and I'm definitely going to keep my feeding using the coral dome!

Tall Skimmer Cup, Small Tank Stand? No sweat!

My protein skimmer's collection cup is impossible to remove from my stand without tilting. This presents a problem when the skimmer is filled with skimmate; tilting the cup will dump the skimmate back into the sump.

Luckily, my skimmer's collection cup has a drain hole with a nipple fitting to connect to 1/2" vinyl tubing. I found some spare parts, and rigged up a piece of tubing and a ball valve. This should allow me to drain most of the skimmate from the collection cup, allowing me to remove the collection  cup for cleaning without spilling any of the dissolved organic stuff my skimmer has worked so hard to remove.


Thursday, June 30, 2011

Illuminating the sump...

"Oh no's! I dropped something in my sump, and now I can't see it! Whatever will I do?!?!"

"Oh no's! Whatever will I do?"
Has this ever happened to you? You're fiddling around with a thumb screw or trying to reconnect some airline tubing to a venturi, and you drop a small part in your sump?

The space under your tank can be a dark and scary place. Items can get dropped, knocked over, or simply just not seen. Holding a flashlight takes a free hand out of the equation, and every hand is needed when working under your sump!

Don't let this happen to you! Put light where light is needed, but not intended to go. Sure, you can put shop lights or even small led lights, but these can cost 10's of dollars and require the use of AC current! Try a touch light today!

The Fulcrum 3 LED 3-Pack Tap Light comes with not one, not two, but THREE touch lights. These battery controlled lights are safer than regular more powerful lights, and are able to be mounted practically anywhere! Change your filter sock, clean your skimmer collection cup in complete ease and simplicity. The extra lighting will make any chore a simple breeze.
Attached easily with double sided tape.
Don't fall victim to the millions of other lighting options avaialble! Use your free hand to change that filter sock, snap your fingers to the beat, or simply wave at your fish!! Purchase your Fulcrum 3 LED 3-Pack Tap Lights today! (batteries not included).
"With my hand now free, I can snap my fingers to the beat..."
*Disclaimer: The Fulcrum lights and linked vendor webpage are not affiliated with nor indorse Chromis' Reef in any way shape or form. This is not a paid advertisement or endorsement. While this blog post is loaded with satire, I really did purchase these lights and install them in my sump stand. The extra light is extremely beneficial, and I feel safe not worrying about extra plugs or having to mount a light fixture in the sump. Until next time...

Saturday, May 7, 2011

DIY Filter Sock Mount

Until today, my filter sock had been resting on a glass baffle. It worked, but was not ideal. I have a Berlin Sump filter sock mount around here somewhere, but unfortunately it didn't work with my sump. After a discussion with the Mr. R. Reef (Credit where credit is due), I was inspired to make a DIY egg crate filter sock holder.

Yes, I used hot pink zip ties. It makes it more scene.

Sock holder, sans sock.

This is how the sock will sit.

I used two small strips of egg crate to create a lip that will keep the sock above water level

Sock holder to the left

Snap shot of the DIY sock holder in my DIY sump.

Someone wouldn't stay out of the shot...

Tada! My filter sock is now supported above the water level. Water is now forced to flow through the sock, not over the sock. I installed (placed) the holder inside my sump. The sock is positioned close enough above the water and low enough from the edge of the sump to prevent any overflows if the filter sock becomes clogged. Yes!

Cost of the project: $0 dollars for supplies as I had everything here from previous projects. If I had to purchase the items new, cost would be under $10 (AquaMaxx filter sock not included in price).

Labor Hours: 15-20 minutes total. (including pictures).

Until next time, friends...

Tuesday, April 5, 2011

My DIY Sump

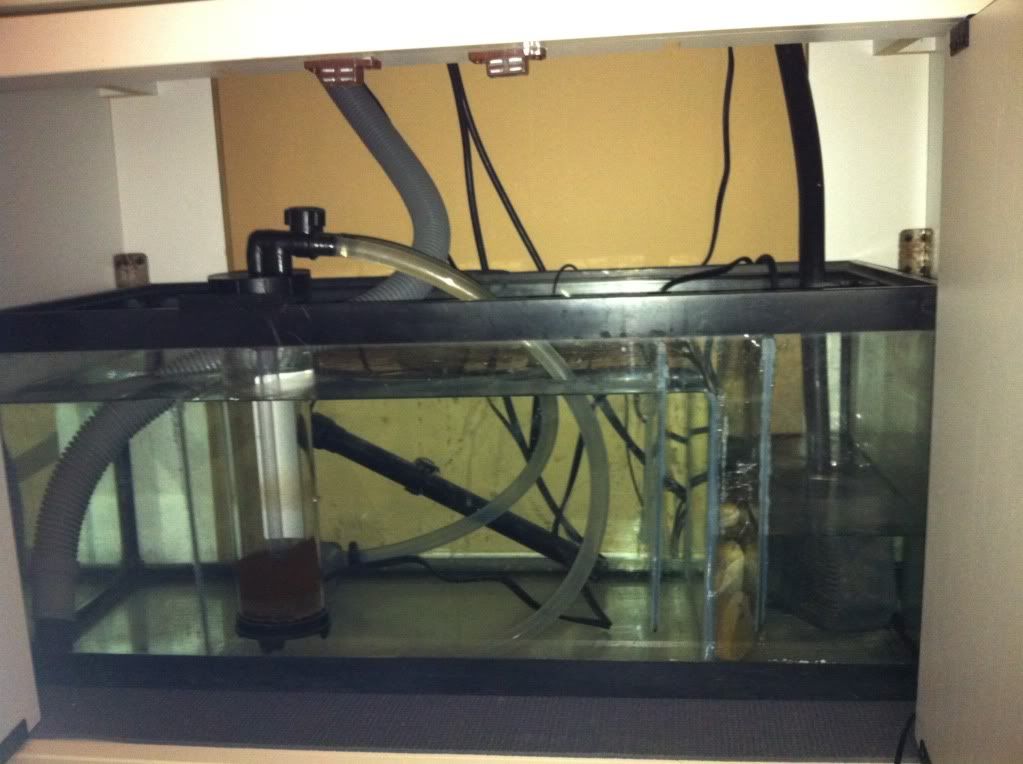
I installed my DIY 20 gallon long sump. Using a design from RemsReef.com as inspiration, I decided to try my hand at my first DIY (do it yourself) sump / glass project. My final product has some areas of opportunity, but so far, so good. There were no leaks from the baffles or aquarium, and the sump is doing its job well. I won't post detailed information on how I built it; if you want to see a professional make a DIY sump, I suggest www.RemsReef.com! He did a great job with his sump, and it came out looking very clean.

Anyways, here's my sump in action. I am very pleased that there is no annoying waterfall noise. I also have a large skimmer chamber to hold an internal protein skimmer down the road. The skimmer chamber is followed by 3 glass baffles that act as a bubble trap, hopefully reducing (possibly eliminating) micro bubbles from entering the display tank. Check out the picture below!


DIY SUMP