Just in case you were wondering how my tank is doing...

Friday, December 9, 2011
Thursday, December 8, 2011
What we can learn from "sexy" fish
 |
| [Image source petslobby.com] |
If you've ever kept guppies, you'll know that sexual dimorphism is present as males are more colorful and have "prettier" tales than female guppies. The unfortunate part is that people tend to buy a handful of males and a couple females and trouble brews. It's recommended to always have a ratio of at least 2:1 female to male guppies. The more females you have per male, the better. The males will literally mate the females to death... Poor guppies.
Read the full article, Sexy guppies shed light on human singles scene MSNBC.com.
Sunday, December 4, 2011
Weekend Update
 | ||||
| "Go Big Money, Go!" |
I reconnected my Reef Keeper Lite and was pleasantly surprised to see that even after a week, the internal memory had kept all of my programming. A couple updates to some timers and a new float switch added to this display tank as overflow protection (if the float on the display aquarium is turned on, my return pump will turn off), and we were back in business.The RKM-Net module connected to the system and my network with absolutely no trouble. I just plugged it back in and I was able to start viewing stats from my phone.
 |
| Wires will be cleaned up... I promise. |
 |
| Vortech Controllers Join The Party... |
 |
| Tank is looking better with RKL running the show. |
Saturday, November 26, 2011
...and the tank overflows.

After I shut off the return pump, i drained some water from the sump. I went to investigate the overflow box. With my hand in the water, i touched my arm to my light fixture and - Zaaaap! I got a nice little surprise. It wasn't a full jolt, but it was a tingle. At this point, I realized something else was very wrong.
Upon closer inspection, I could see that water had dripped out of the tank from the side, casually cascading onto my electrical components, all conveniently located in one place. My GFCI was soaked, and dripping water, and there were splashes on other components. To be safe, I unplugged everything, and said goodbye to the GFCI. I'll be running everything in emergency mode to see what I can salvage.
I'm seriously rethinking this tank setup. Right now, anything looking DRILLED is looking good...
Friday, November 25, 2011


Sunday, November 20, 2011
Testing: You can do it!!

I use the API tests. Yeah, yeah, yeah... these tests get a bad rap by many hobbyists. Personally, I think they're great. I'm not looking for lab grade scientific testing... I barely passed chemistry in high school; I'll leave the hardcore testing for the chemists. What I want is an easy to use and affordable test kit. Yeah, the more expensive kits can be a little more precise, but I'm looking for ball park figures. I know my tank and I keep up with water changes. Why kill myself over a fraction of a fraction of a percentage?
Don't get me wrong, there are some really nice liquid test kits, and I'm a big fan of the Hannah Checkers; both are still relatively easy to use and can provide the accuracy that puts some hobbyists at ease. For simplicity and budget's sake, you can't go wrong with the API Salwater and API Reef Master Test Kits.
I've tested today using my API test kits and a Salifert Magnesium Test kit. I am happy with the levels as I had lower Calcium recently, and I'm trying to keep my Alkalinity low due to the use of biopellets on my system. I've posted the test results below:
Ca: 440
Alk: 8 dkh
Mag: 1500
pH: 8.2
Nitrate: 0 ppm
Levels look good, biopellets seem to be working well... Photos soon!
Sunday, November 13, 2011
New frags from Garrett's Acropolis
I got to see something really special today; Garrett's Acropolis. Steve was kind enough to show us his impressive coral propagating system. Located outdoors, his system utilizes natural light and under 600 watts of electricity to run! It's a beautiful system, with healthy, beautiful, and a good variety of rare corals.
I opted for some easier to keep acros, green slimer, a monti, and a birds nest (Ora birds of paradise) coral. I also got a blue Xenia frag!
You can see some great pictures of Garrett's Acropolis featured on Marine Depots Featured Tank for July 2011. Marine Depot also posted a video to their YouTube channel. I've posted it below:
You can also view more on Garrett's Acropolis on his official website at www.garretts-acropolis.com.
Finally, here's some pictures of my tank and the new frags (Taken with my iPhone, sorry. I'll get some with the DSLR soon).Until next time...
Friday, November 11, 2011
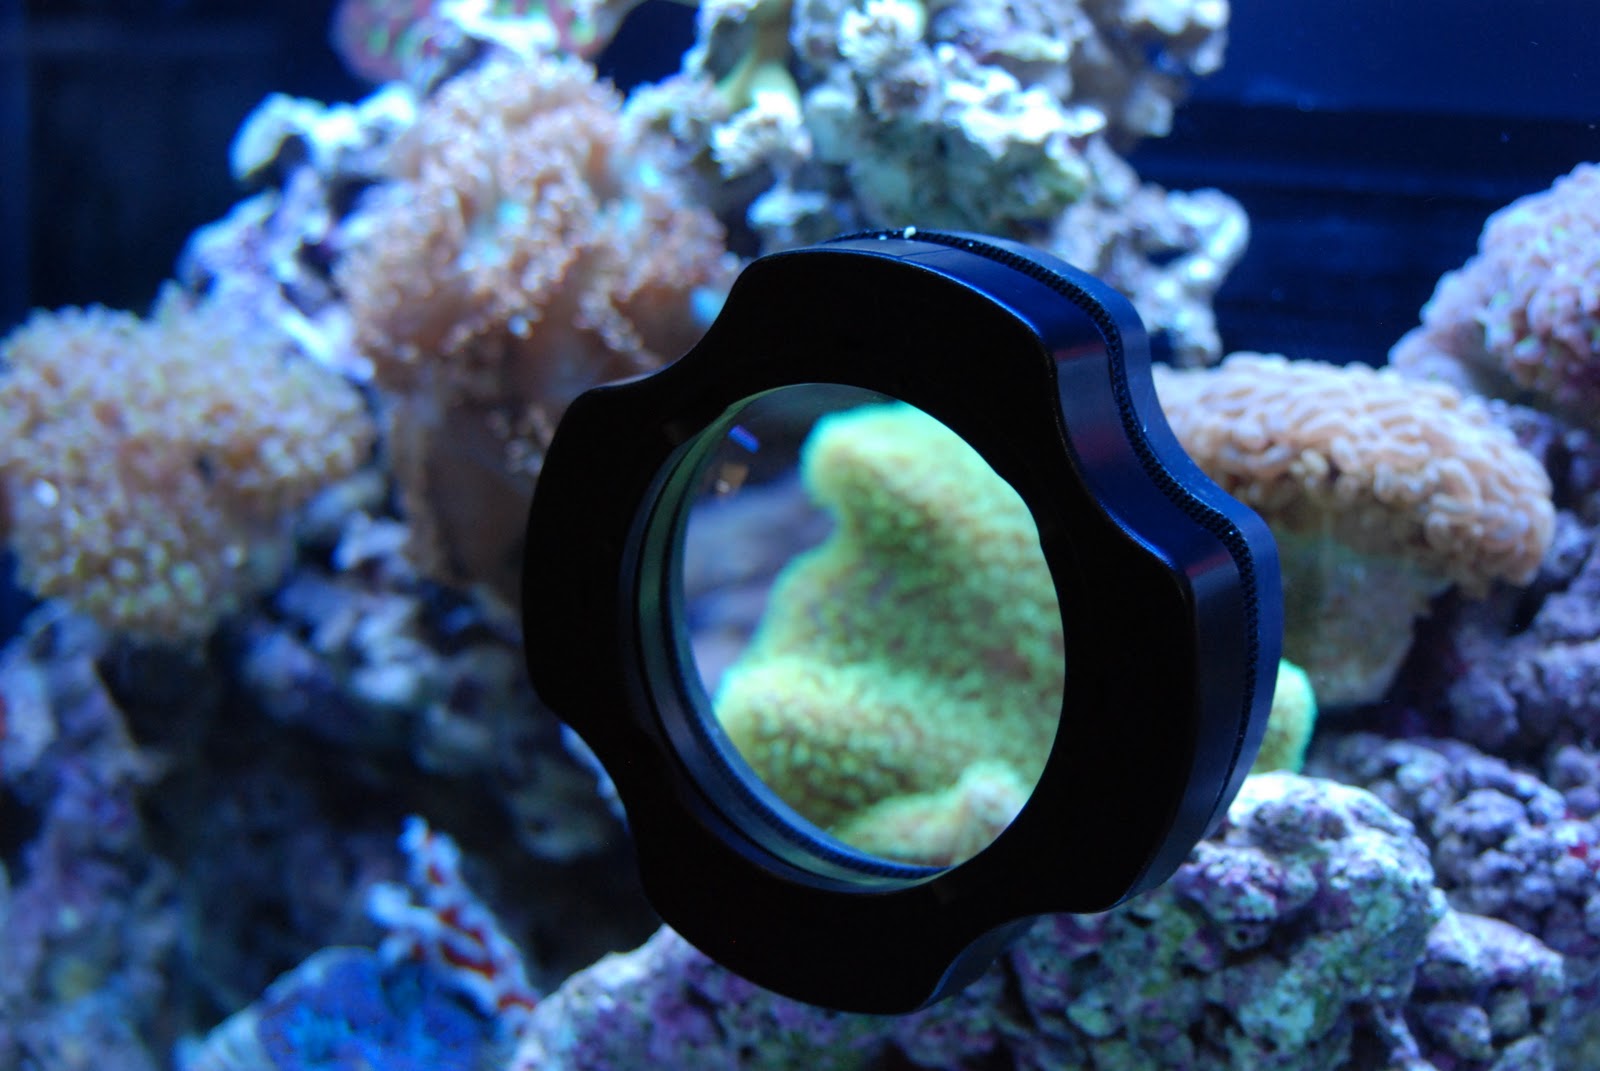
Digital Aquatics RKM-Net Module

The install isn't any more difficult than say, a webcam or home-network router, however it's definitely going to be a challenge for anyone who is not comfortable with computers.

I have some more tinkering to do, but so far I'm really happy with the new capabilities!
Check out the pictures and screen shots below. I'll post more info soon!


Friday, October 28, 2011
Reef A Palooza 2011
I stopped by the 8th Annual Reef A Palooza show/event this past weekend in Costa Mesa, California. Reef A Palooza is an aquarium trade show promoted by the Southern California Marine Aquarium Society (SCMAS). RAP isn't so much a trade show as it is an indoor marketplace where sellers, exhibitors, and hobbyists of all meet to sell, trade, or show off their products. This was my first year visiting RAP, and I was not disappointed.
I got to see some nice coral, fish, and displays. There was a wide variety of vendors, big and small, online and brick and mortar. Marine Depot, an online retailer, had a large booth shared with Innovative Marine. A spin of the wheel at the Marine Depot booth offered the opportunity to pick up a prize. While you were at the booth, you could check out some of the hottest products in the market such as Innovative Marine Aquariums, Ecotech Marine Radion LED light fixtures and Vortech Pumps, the Kessil 150W led fixture, Mr. Aqua frameless tanks, AquaticLife T-5 lighting, and Orphek Power Reef LED fixtures to name the biggest attractions. Another popular hit was the Innovative Viewing Systems Portal on a Red Sea Max aquarium. This was a show stopper for sure.
Other vendors featured their products. AquaticLife had a large booth featuring their lighting systems, and Ecoxotic introduced their new Panorama PRO fixture. The new Panorma PRO fixtures are said to offer stronger lighting for deeper aquariums than the first generation fixtures, and the price point is said to be competitive with other fixtures. This fixture is definitely something to keep an eye out for, and I'm anxiously waiting for the fixtures to roll out completely.

On the additives side, industry giant Seachem was present to showcase their large line of supplements including their premium Aquavitro line. Additive and supplement company, Aqua Vision Aquatics, had a booth featuring their wide range of products. Aqua Vision Aquatics offer a nice bang for your buck, and feature supplements with updated formulas to meet the needs of the modern reef aquarium.
Industry blog leaders such as ReefBuilders and Reef Addicts were also among the booths. The show also had many great speakers in the speaking room providing information on a wide range of topics.
Reef A Palooza was a small, but fun show. Their were over 70 exhibits and an estimated 3000 visitors over two days! This local show has potential for growth, and I imagine an even greater show next year at Reef-A-Palooza 2012!!
Be sure to check out Marine Depot's Facebook page for some pictures of their booth and other great pictures from Reef-A-Palooza 2011!
 |
| Red Sea MAX 250 - Silver |
 | |
| Creative Idea: IKEA light fixture w/ a PAR38 LED bulb |
Other vendors featured their products. AquaticLife had a large booth featuring their lighting systems, and Ecoxotic introduced their new Panorama PRO fixture. The new Panorma PRO fixtures are said to offer stronger lighting for deeper aquariums than the first generation fixtures, and the price point is said to be competitive with other fixtures. This fixture is definitely something to keep an eye out for, and I'm anxiously waiting for the fixtures to roll out completely.
 |
| 4" Innovative Viewing Systems Portal |
On the additives side, industry giant Seachem was present to showcase their large line of supplements including their premium Aquavitro line. Additive and supplement company, Aqua Vision Aquatics, had a booth featuring their wide range of products. Aqua Vision Aquatics offer a nice bang for your buck, and feature supplements with updated formulas to meet the needs of the modern reef aquarium.
 |
| Ecoxotic Panorama Pro LED Fixture |
Industry blog leaders such as ReefBuilders and Reef Addicts were also among the booths. The show also had many great speakers in the speaking room providing information on a wide range of topics.
Reef A Palooza was a small, but fun show. Their were over 70 exhibits and an estimated 3000 visitors over two days! This local show has potential for growth, and I imagine an even greater show next year at Reef-A-Palooza 2012!!
Be sure to check out Marine Depot's Facebook page for some pictures of their booth and other great pictures from Reef-A-Palooza 2011!
Friday, October 14, 2011
iPhone Video
Yellow Tang and ORA Yellowline Goby munching down on some of Julian Sprung's Sea Veggies Purple Seaweed... Delicious.
Wednesday, October 5, 2011
Feeding the Sun Corals
 I've had my Sun Coral for over a week, and I they haven't come out much, even during feedings. I've tried a few things, but it seems that feeding them is a nice way of enticing (bribing) them to come out.
After some research, I found a useful trick: cover the coral to allow them to feed undisturbed. The instructions recommended a 2-liter bottle top, but since my frag is still pretty small, I used the top off a small water bottle. I cut the bottle about 1.5" below the neck, peeled off the label, and gave it a good rinse with warm water. I made a small hole in the lid, but decided it was unnecessary after the first try...
I put this top over the Sun Coral and added some frozen Mysis Shrimp. Within a few minutes, I saw some polyp extension, but most heads stayed half way in or more. I left the bottle cover in the tank for about 30 minutes, and then I removed it.
On try number two, I removed the cap. This time I tried some cyclopeze. I left the bottle top in the tank for several hours. Success! The heads all popped out!!
I'll keep my fingers crossed, and I'm definitely going to keep my feeding using the coral dome!


Tall Skimmer Cup, Small Tank Stand? No sweat!
My protein skimmer's collection cup is impossible to remove from my stand without tilting. This presents a problem when the skimmer is filled with skimmate; tilting the cup will dump the skimmate back into the sump.
Luckily, my skimmer's collection cup has a drain hole with a nipple fitting to connect to 1/2" vinyl tubing. I found some spare parts, and rigged up a piece of tubing and a ball valve. This should allow me to drain most of the skimmate from the collection cup, allowing me to remove the collection cup for cleaning without spilling any of the dissolved organic stuff my skimmer has worked so hard to remove.


Luckily, my skimmer's collection cup has a drain hole with a nipple fitting to connect to 1/2" vinyl tubing. I found some spare parts, and rigged up a piece of tubing and a ball valve. This should allow me to drain most of the skimmate from the collection cup, allowing me to remove the collection cup for cleaning without spilling any of the dissolved organic stuff my skimmer has worked so hard to remove.


Sunday, September 25, 2011
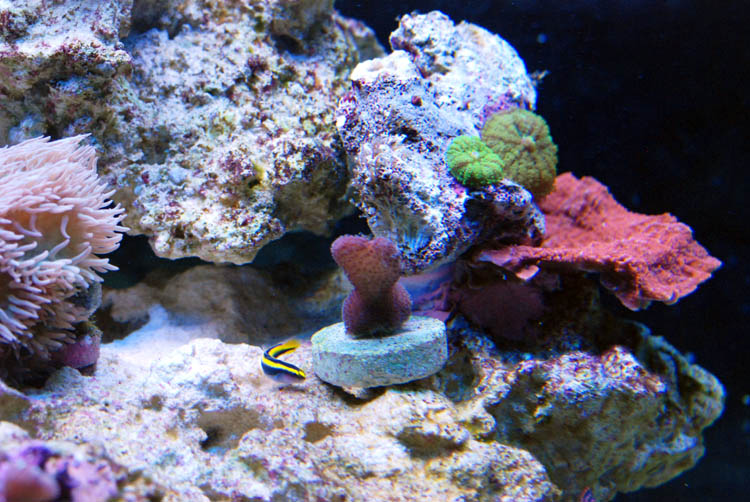
New Additions and Pictures
I took a trip to a local fish store and purchased a few corals and a fish. I purchased some Zoas, a Sun Coral, a Cat's Paw, and some Orange Mushrooms. The fish is a medium sized Yellow Tang.
After acclimation and a few hours, I snapped some photos. Everything is still getting settled in, but I've been messing with the placement of rock lately and i wanted to get some pictures. I was browsing some past entries, and I can see the progress and changes in the tank over that past few months. It's easy to miss the growth and changes when you see your aquarium everyday, and it's comforting to be able to see just how much everything is coming along. Check out the pictures below.


 Until next time...
After acclimation and a few hours, I snapped some photos. Everything is still getting settled in, but I've been messing with the placement of rock lately and i wanted to get some pictures. I was browsing some past entries, and I can see the progress and changes in the tank over that past few months. It's easy to miss the growth and changes when you see your aquarium everyday, and it's comforting to be able to see just how much everything is coming along. Check out the pictures below.


Saturday, September 24, 2011
Red Sea's Aiptasia-X

Many hobbyists employee natural removal methods including (but not limited to) Nudibranch, Peppermint Shrimp, and even certain fish such as the Aiptaisia Eating Filefish or the Raccoon Butterfly Fish. Employing natural Aiptasia control methods has it benefits such as not dosing or adding anything to the aquarium and relative ease of just adding some live creatures to do the work for you. These methods are not all equal, not all guaranteed to work, and can have some unforeseen consequences such as some of these critters quickly changing their diet to your coral.
I didn't completely rule out these "Natural" methods, but the current downsides and risks outweighed the immediate benefits. So I thought I would try a Aiptaisia product. I have tried Joe's Juice in the past with very positive results. The anemones I was able to target didn't return, however I didn't follow up as I saw new anemones and the population slowly grew back. Being the curious hobbyist, I decided to try another product that fellow hobbyists have used and experienced great results. I picked up a bottle of the Red Sea Aiptaisa-X. It worked like a charm.
Once unpacking the items, the first thing that caught my attention was the two syringe tips. They had a threaded backside to connect directly to the threaded portion of the syringe for stability and control. The tips were also metal, which offers longevity if kept clean. I also thought that including the two different angled syringe tips (one straight angles, one at a 45 degree angle) was a well thought out move on behalf of Red Sea. Kudos to Red Sea for thinking of the customer and the application. It's much easier to apply this product to the underside of rocks and tough to reach places.
The product itself is purple, and not as thick as other products. It was easier to apply and it didn't clump up. I followed the directions, which require that all water movement (my return pump and EcoTech Vortech pumps) were turned off for 30 minutes. This allows the solution to be delivered directly to the little buggers, and prevents the product from accidentally coming into contact with your "good guy" coral and anemones. This was a lesson learned the hard way after I damaged my prized Blastomussa. It had been doing well and growing up until that day, and it's been clinging to life ever since. So be aware of what you are doing, follow the directions (they're there for a reason), and the product is safe. It will also not alter your water's chemistry.
It's fairly simple to use this product. Apply the tip you wish to the included syringe, fill syringe with solutions, find your target, and gently release the product onto the anemone's disk. Doing this slowly prevents the anemone from retreating before consuming the product. You will want to ensure that the disk is covered with solutions, and leave the product in place for about 30 minutes; you will want to leave your pumps off for this time. That's pretty much it. I didn't think of taking pictures of the culprits before I decide to treat them, but I think I see another one hiding, and I'll try to get a picture of the process next time...
Do I recommend this product? Definitely.
Will I use it again? I hope not, but definitely.
Thank you for stopping by! Until next time, friends...
Sunday, September 4, 2011
BTA Rose anemone split
My Rose Anemone just split... and one of the halves is on the move... time to put those foam covers back onto the Vortechs...
Now there are two anemones my clown hasn't hosted!
Now there are two anemones my clown hasn't hosted!
Sunday, August 28, 2011
Will She Host?

I've also read on a few forums about posting pictures of Clownfish hosting in anemones. Okay, that's a bit unconventional... I don't really buy it. I'll keep reading and looking for something else...
Well, post after post on several sites and forums seemed to back up this picture method, and I was finally inspired to give it a try. I founds some good color pictures at Rem'sReef.com. You can read about the success he had in his blog post, "Adding a Picture Does Get Clownfish to Host!"
I've printed the pictures and taped them to my tank. My Clownfish has responded so far by hiding in the back of the tank behind the rock work. While I have no idea if this will work or if my clown will ever host at all, what do I have to lose?
I'll keep you posted! Until next time...
Wednesday, August 24, 2011
Bioplastics Reactor Giveaway!!!
I love giveaways, I'm a huge fan of MarineDepot.com, and I really like my Two Little Fishies PhosBan 150 reactors, so I wanted to share this:

Until next time...
MarineDepot.com is giving away a Two Little Fishes NPX Bioplastics Reactor 150 with 200ml of NPX media (as seen on ChromisReef.com (and all over the web)). Your chances to win are pretty good; so far, there have only been about 25 posts. I'm not much of a gambling man, but the odds are in your favor! All you have to do is visit the Marine Depot Forums and post a comment in the Official Giveaway Thread.
Marine Depot provided the following information about the giveaway:
"Our staff receives alot of questions about biopellets, zeovit, prodibio, etc. so we started a new section in our forum to cover these topics: Probiotics and Labile Organic Carbon Dosing. It is moderated by Murray Camp (About Murray).
We are doing a giveway to bring awareness to the new forum. The winner of the giveaway will receive a Two Little Fishes NPX Bioplastics Reactor 150 with 200ml of NPX media.
There is no purchase necessary to enter. U.S. residents 18 and over merely need to post something into the official giveaway thread to be eligible. On September 19, a potential winner will be chosen randomly and contacted with a private message (PM) on the forum. They potential winner will have 14 days to reply to claim your prize. Entires are limited to one per person."
Go sign up! Take a look around. The moderators on the Forums are great: they are extremely knowledgable, helpful, and much nicer than moderators on some other well known forums. You can enter to win a cool product and learn something along the way!
Until next time...
Thursday, August 18, 2011
As promoised...
A picture says many more words than I'm willing to type at the moment...


 Please excuse the algae. Thanks.
(The images were also posted on the photo page.)


(The images were also posted on the photo page.)
Thursday, August 11, 2011
Aquarium update
I have some exciting updates! First, I just installed a BioPellet reactor. I used AquaMaxx BioMaxx Plus BioPellets available for cheap from MarineDepot.com. I also picked up another Two Little Fishies PhosBan 150 reactor (and the BioPlastics screen) and a Danner Supreme Mag-Drive 3 pump. The Mag-Drive 3, or what is often referred to as simply a "Mag 3" will provide 350 gallons per hour; enough to power both of my reactors: the PhosBan reactor and the new BioPellet reactor. To help seed the bacteria, I also bought a bottle of Brightwell Aquatics MicroBacter7. I had to delay the installation by one day because I forgot to get some plumbing parts. I would recommend drawing out your setup before the install, and verify that the pump you are using comes with the adapters you need. It's a bummer to wait a day because of a $3 part that adapts your pump to vinyl tubing.
When using Phosphate media (GFO) in a reactor, you typically need a low flow, however for BioPlastics, you will need more flow to provide a steady tumble. I used a Y fitting to split the outlet from my Mag 3, and used the ball valves included with the reactors to adjust the flow. Use your eyes to get the flow right. I have no perfect gallons per hour number. You will want a slow tumble for the bio pellets; they should move freely without clumping, but you don't want them overly fluidized. For GFO (such as TLF Phosban), you will want the media to just barely bubble, as if it were JUST ABOUT TO BOIL.
The install is rather straight forward. There are many great how-to articles explaining the process, so I won't go into much detail. I will say that you MUST have a good protein skimmer. A protein skimmer will remove the excess bacteria released from the BioPellets. You will notice a thicker, darker, and more quantity of skimmate once the BioPellets mature.
When starting with BioPlastics, it is recommended to divide the final amount of required media and added it slowly. It is GENERALLY recommended to use 100ml per 25 gallons of system volume. For my aquarium, I will need roughly 300ml. I have started with half that amount- 150ml, but I have heard of others using only 1/3 of the final amount. I'm a bit impatient. I will increase the amount of media in the reactor to the final amount by adding 50ml of new media every week until I reach 300ml. This practice is something that has been recommended by hobbyists to help wean your tank onto this system, and prevent possible bacterial blooms and other associated problems. This has not been recommended by the manufacturers, but I'm sure taking it slow would not hurt. As an important side note, it is necessary to wean your system off of biopellets when discontinuing the system.
Not sure what BioPellets do, how they work, or what they are? Check out this article: How Do Bio-Pellets Work (Melev - ReefAddicts.com, 2011) and this video: Q&A with Julian Sprung: NPX BioPlastics (MarineDepot.com's YouTube Channel, 2011).
The BioPlastics will help me control nitrates and phosphates. This in turn helps keep algae in check and allows me to feed my tank a little better as it is recommended to feed your aquarium well (or extra well) to help the system flourish. This is a great benefit to the system; lots of food, low nutrients.
Unfortunately it's rather dark in here, and my camera takes terrible pictures in darker situations. I will post images of the install later. I will update on the progress of the system as it matures, and I am confident I will see positive results after a month or so.
And finally, I'm happy to report that I got some new tank additions including a BTA Rose anemone, a Red Scooter Blenny, a Maxi-mini Anemone, some additional snails for the clean up crew, and last week I added a cleaner shrimp. I'll post more information in my next update. Thanks for checking in, and until next time...
Wednesday, August 10, 2011
Back from vacation: New post soon!
I'm back from vacation. The tank was mostly automated and we had no problems with the exception of a fish that is MIA. The only help I asked for was the moving of the tube from one top off reseviour to another.
I'm going to be installing a Two Little Fishies Phosban 150 Reactor for use as a Bio Pellet reactor. I'll have a full post coming soon...
I'm going to be installing a Two Little Fishies Phosban 150 Reactor for use as a Bio Pellet reactor. I'll have a full post coming soon...
Friday, July 15, 2011
Aquascape with Base Rock
Live rock is essential to the reef tank. It provides a place for beneficial bacteria to colonize, it helps seed your aquarium with bacteria, provides and place to attach your coral, and turns a plain tank into a living piece of art. Live rock is great, but it can be costly. Prices can vary, but I typically see live rock for about $5 per pound. This is not always friendly on the budget, and you never know what you're going to get hidden in the live rock.
Solution? CaribSea SouthSeas Base rock! Base rock can take many forms, but generally refers to aragonite or limestone rock that is dry and thus is not seeded with beneficial bacteria, Coraline algae, or other life forms. The lack of live critters and Coraline algae may be a drawback for some, but others see this as benefit. Dry rock is essentially dead; there's no chance for harmful hitchhikers! That means no Aptaisa Anemones, Bristleworms, Mantis Shrimp, etc... You get a clean start! There are many great bacteria additives to seed your tank with beneficial bacteria, and Coraline Algae is easily attainable from another hobbyist. You can bring life to your tank by adding copepods to your tank. Given time, your base rock will be live! (It's ALIVE!)
Not convinced? Base rock is also less expensive compared to live rock. Compare $2 to $3 per pound for dry base rock versus $4 to $5 (if you're lucky) for live rock. I've personally seen live rock at local shops for $10 a pound. At 1 to 2 pounds of live rock per gallon, this can add up quickly. Let's do some simple math!
Let's say Johnny has a 40 gallon breeder. He wants about 1.5 pounds of rock per gallon:
Ok, so for my future aquariums I will probably start with all base rock. However, I already had live rock when I started my current aquarium. I needed more rock, and I was having a hard time justifying $5 a pound for live rock at local stores. I was looking at 20-30 pounds, or $100-150 for live rock- rock I'm mostly certain will have little hitchhikers that will leave me pulling out my hair. For under $3 per pound, I purchased 40 lbs of Caribsea South Seas Base Rock! Woohoo! While the rock is devoid of life, it will become "live" within several months to a year as my existing live rock will seed the new rock. Over time, it will color up to look like the rest of the rock in my tank, and I won't be able to tell the difference.
CaribSea says that, "South Seas [base rock] is a calcium carbonate base rock that is very similar to actual reef rock and at one point actually was, although it is obtained terrestrially from ancient coral reefs underground." The rock is very porous and stacks easily. Good enough for me!
Upon inspection of the rock, the rock was generally clean. My particular box featured beautiful, large pieces. No rubble at all. I was very pleased. As expected, there was some dust in the box, but there were no other surprises in the rock. I soaked the rock and rinsed it in RO/DI water. This step removed the dust, preventing my aquarium water from becoming cloudy. Rinsing will also ensure there are no chemicals or other items leached into the tank. Using RO/DI water instead of tap water is an extra safety step to ensure nothing from tap water is absorbed by the rock and leached into my aquarium down the road. Better to be safe than sorry.
After rinsing, I allowed the rock to dry in the sun for a while. As the new base rock was drying, I started moving rocks and corals to make room for the new base rock I was about to add. Okay, time to add the rock! To be honest, It's not all that exciting. Aquascaping is my least favorite chore. I am too picky and I can never get the rock exactly how I envisioned it. So let's skip forward an hour or so... And the rock is in!
The rock looks great! While it does look different from my existing live rock (being clean and white), in time Coraline algae will cover the rock and it will fill with life. I am happy I was able to save a few bucks and not have to worry about adding unwanted hitchhikers. The new rock has offered more real estate for my coral, and more hiding places for my fishes.
Until next time...
 |
| CaribSea SouthSea Base Rock |
Not convinced? Base rock is also less expensive compared to live rock. Compare $2 to $3 per pound for dry base rock versus $4 to $5 (if you're lucky) for live rock. I've personally seen live rock at local shops for $10 a pound. At 1 to 2 pounds of live rock per gallon, this can add up quickly. Let's do some simple math!
Let's say Johnny has a 40 gallon breeder. He wants about 1.5 pounds of rock per gallon:
- 1.5 lbs x 40 gallons = 60 lbs of live rock
- 60 lbs of base rock x $3 per lb = $180
- 60 lbs of live rock x $5 per lb = $300
"But Chris, you bought live rock and then added base rock? What's the deal?"
 |
| Good sized rock. (iPhone for reference). |
 |
| Stacks "like Legos" according to my coworkers. |
 |
| Porous. One large piece had holes that were perfect for holding frag plugs! |
 |
| RO/DI water. I just kind of liked this shot. |
 |
| Soak and rinse to get off the dust |
 |
| The rock is in. (Sorry for the terrible picture, moonlights and all.) |
 |
| **Updated: Daytime photo of new rock |
Until next time...
Subscribe to:
Posts (Atom)