Tuesday, March 29, 2011

Two Little Fishies PhosBan Reactor 150

My last entry was a little over the top with satire, but I was serious about my aggressive action plan to neutralize the Dinoflagellates that have developed in my aquarium.

Reactor
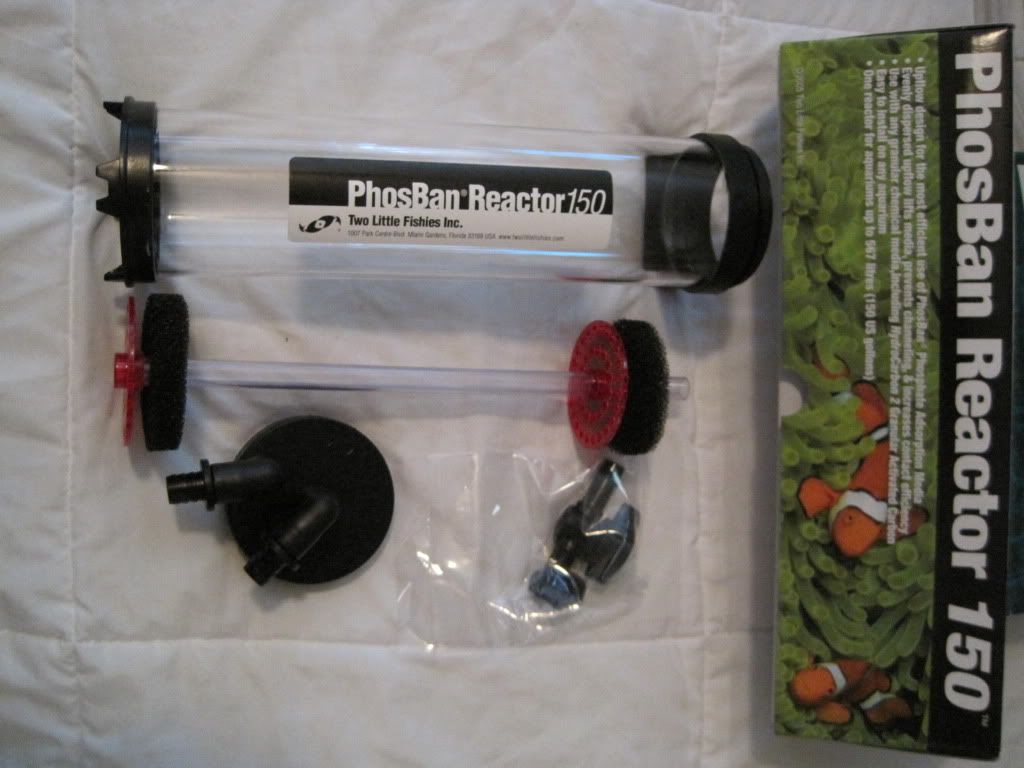
One part of my action plan included the addition of GFO (granular ferric oxide) media. I added a Two Little Fishies PhosBan Reactor 150 to the setup. I was pretty excited to get home and set the reactor up. Upon opening the box of the reactor, I was impressed with the simplicity of the setup. The instructions in the box were detailed and easy to follow. The reactor had only a few pieces, and was no trouble to assemble.

I purchased a Maxi-Jet 600 to feed water to the reactor. The MaxiJet is a great little power head with seemingly endless possibilities, and I was impressed with all the attachments and adapters included with the pump. Maxi-Jet power heads are simply awesome, and I can’t stress that although many consider them old technology, they are strong pumps, they are extremely versatile, and they are very affordable.


Maxi-JetLots of goodies!


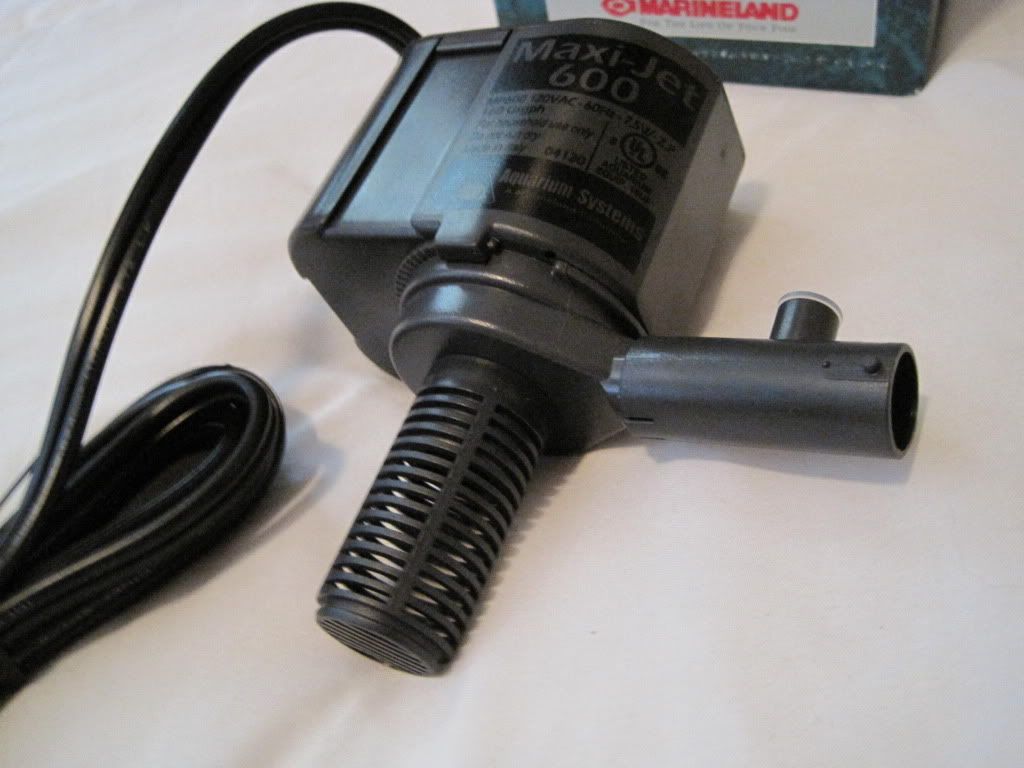
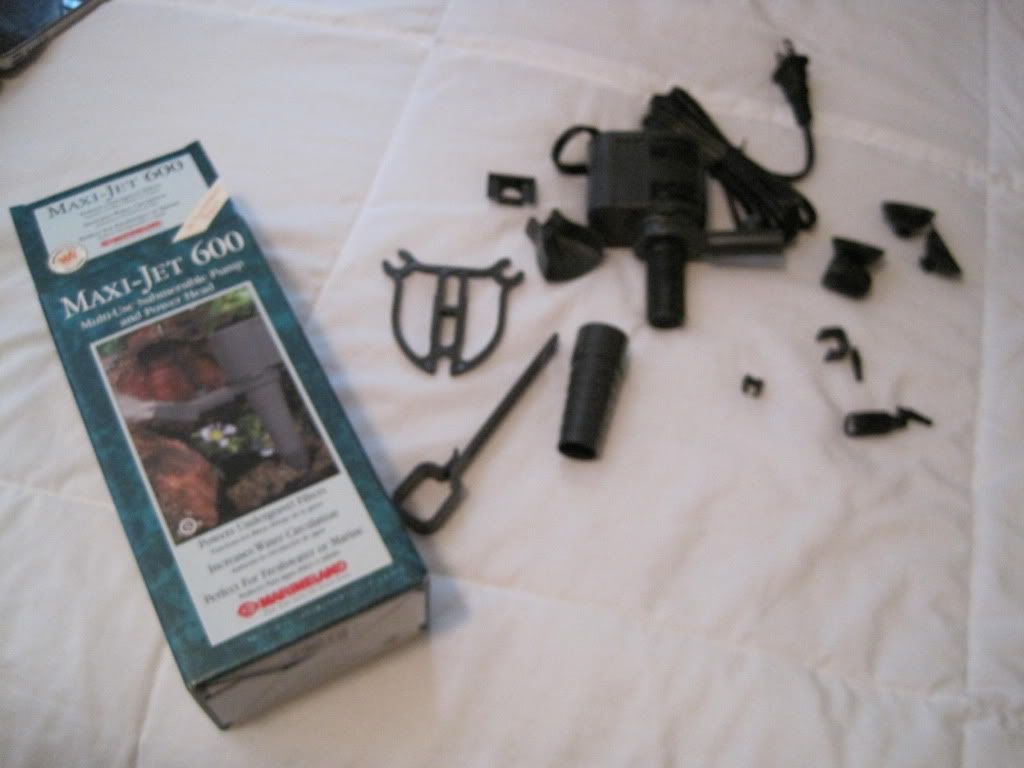
A great benefit of the Two Little Fishies PhosBan reactor is the options you get with one reactor. The media reactor is flexible; you can use it for GFO, activated carbon, or even NPX Bio Plastics* (*with the addition of the screen adapter). The reactor is compatible with many pumps as long as you use the included ball valve to adjust the flow for the media you are using (you shouldn’t mix medias in one reactor). In fact, the Maxi-Jet I purchased is overpowered for this reactor, and it may come in handy if I choose to run carbon instead of GFO media. I wouldn’t mind purchasing another reactor for activated carbon as well, and I am itching to run NPX Bio Plastics in the future.

Connect the TubingInstalled in sump
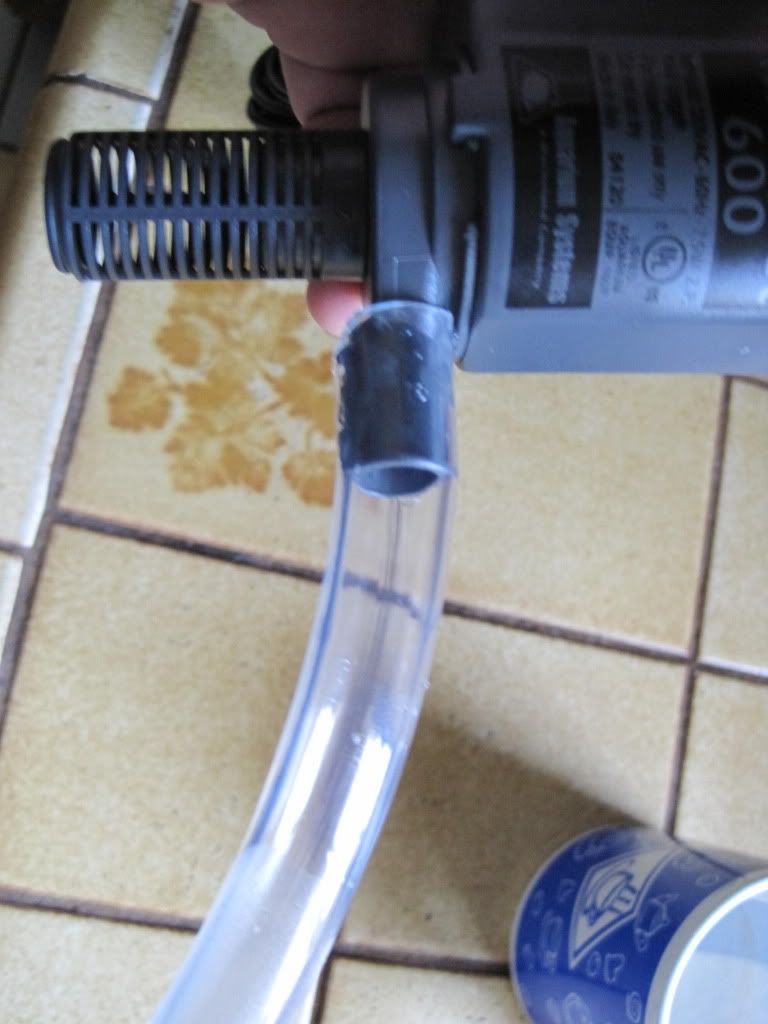
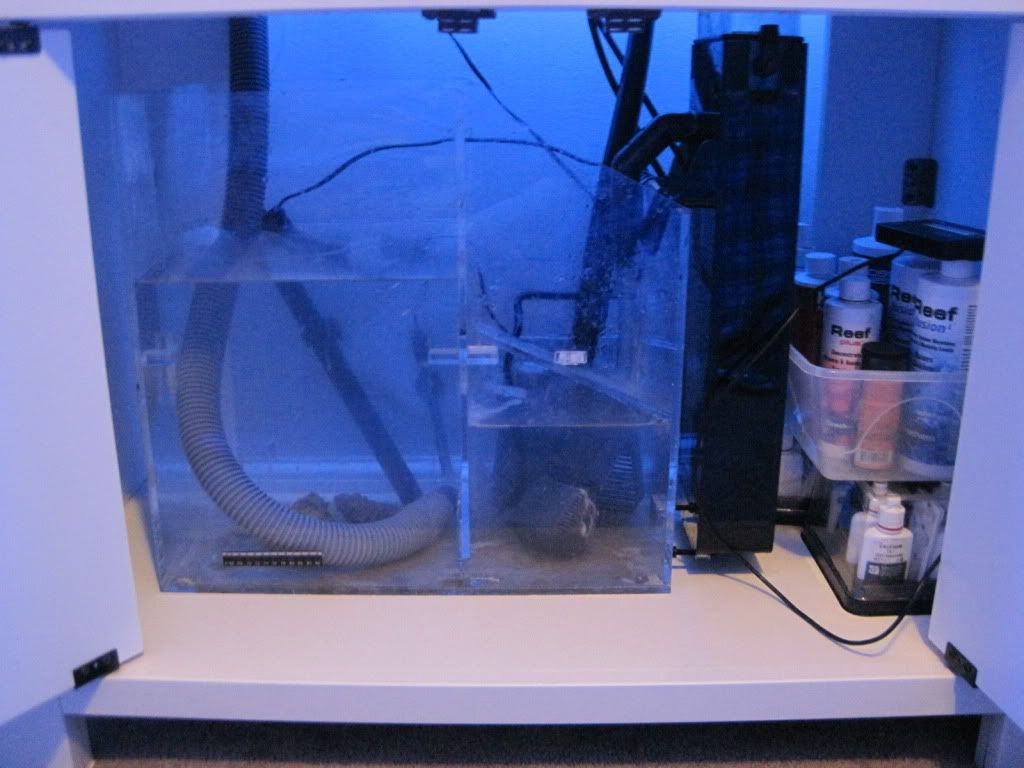
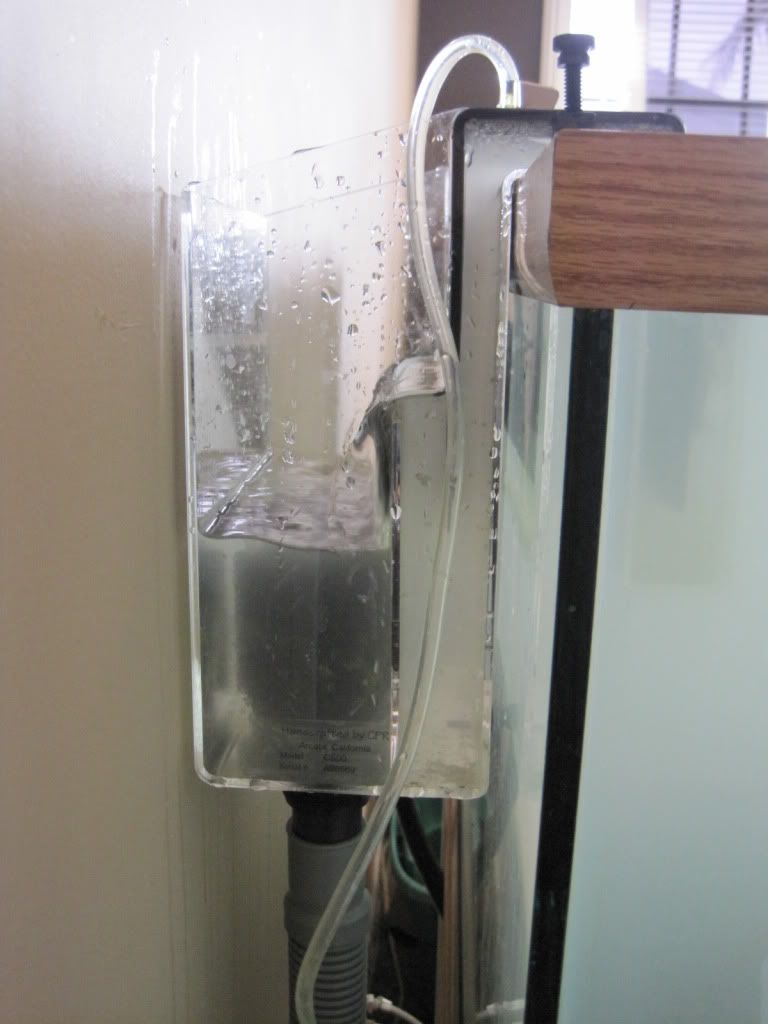
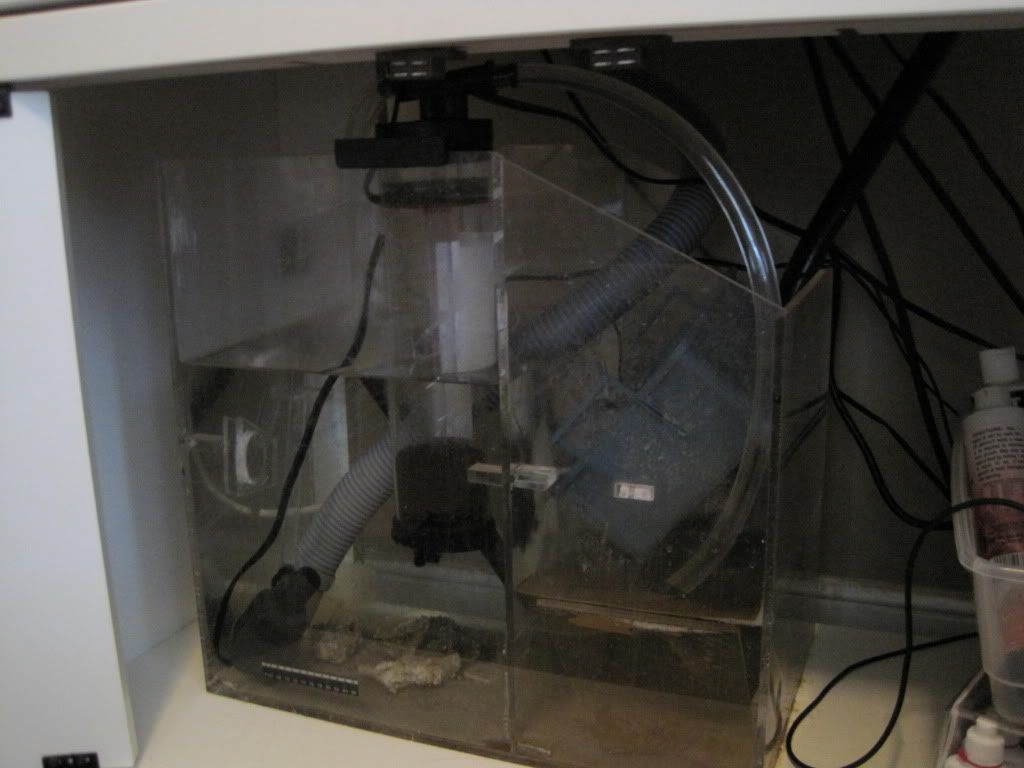
The installation of the reactor was simple. All you need to do is assemble the inner components and adjust the sponge, add the media (I’m using Two Little Fishies PhosBan), connect the tubes and pump, and plug it in. The process only took a few minutes, and now my fish system is ready to reap the benefits of a GFO media reactor. I used 1/2 inch clear vinyl tubing, and forced it onto the maxi-jet outlet (which is 5/8 inches). I heated some water in the microwave for two minutes, put the end of the tubing in the hot water for about a minute, and then slipped the tubing right over. The included hose clamp holds the tubing in place on the Maxi-jet. The reactor can be mounted on the back of an aquarium, outside a sump, or even inside a sump. I installed my reactor by hanging it on the edge of the sump, but with the reactor body sitting inside the sump. This is a simple precaution to prevent and overflows due to leaks in the reactor. I’d rather be safe than sorry.

The Two Little Fishies Phosban Reactor is versatile, easy to set up, and will provide many benefits to my aquarium and my aquarium's inhabitants. The reactor, with GFO media, is expected to keep phosphate levels at zero, and hopefully it can help me tackle this Dino problem. Until next time...

Saturday, March 26, 2011

It's on... like Donkey Kong!

I am taking a break from destroying my tank at the moment and executing the battle plan.

I have been experiencing what I had assumed was a simple brown algae problem, but credible intelligence from my secret operatives (a.k.a. clever coworkers) suggests that my small "Algae Problem" (as I had oh so foolishly assumed) is not an algae problem at all. Oh no, it's much worse... It's an attack of The Dinoflagellates. Oh yes! I'm on to you "snotty" little guys and your rue! You can't fool me (for long). I won't stand by as you invade my reef tank!

SO TODAY- I DECLARE WAR ON THE DINO'S!


The evil Dino Empire shall perish at the hands of a very angry and determined hobyist! I might worry about posting my "secret" battle plan on the internet, but I trust my 3 readers won't tell... plus I'm pretty sure that there's no WIFI access in my aquarium.

The Battle Plan:
* Siphon out any brown "snot".
* Use activated carbon and GFO (going to need to purchase a TL Phosban reactor).
* Reduction of light or no-light periods.
* Moved my skimmer to display tank - I shortened the length of tubing and hopefully this will ensure my skimmer works a little better. Not impressed by the lackluster results I have seen while it has been on the sump.
* Water changes, because water changes cure all.
* Reduction in amount of food fed to coral / fish. My theory of "lots of food for me, so lots of food for you" has many holes. (There's a serious flaw in the logic there, but that's a different post and a different blog.) Also, I'll make sure I rinse any frozen food before it enters the aquarium. I'm THAT paranoid.

Well that's the battle plan. I'm sure I missed something, but I better get back to work. (P.S. Thank you for dealing with my war references.)

Thursday, March 24, 2011

It's RO Wednesday!

Payday comes but twice a month, and what better way to celebrate pay day than buying gear for the tank! I needed a new color changing DI cartridge, but why stop there?

Flush valveI bought a TDS meter (total dissolved solid) and a flush valve kit. The TDS meter will allow me to monitor the total dissolved solids of the incoming city water and my final product water. The flush valve kit is a simple device that allows me to bypass the flow restrictor, allowing water to flow faster through the TFC membrane. Flushing your TFC membrane will help extend the life, so hopefully I can get 3 years out of the membrane. Time (and my TDS meter) will tell.

TDS meterAfter the install, the TDS is reading around 460 tds going into the RO/DI unit (good ol' city water) and reading 0 tds coming out (like mountain spring, but better). Allow me to jump on the bandwagon: "Winning"... Yeah, I said it. It's my blog: I do what I want!!!

Next update: A new fish, coral, and a clam are currently in route for delivery tomorrow. I'll post pictures of the new arrivals after they are all here!

Tuesday, March 22, 2011

After the first week...

The first week of the 60-gallon reef build has passed. I don't have too much to report. On the equipment side, things are working well. In my last post, I talked about a Current LED lumen Pro Light strip. I'm really pleased with the color and light so far. I connected it to my ReefKeeper and have set up a dusk/dawn light effect. The LED strip comes on 1 hour before the first T-5's come on and then 1 hour after the t-5's come off.

The aquarium has developed an algae and diatom problem. I'm not sure if it is normal or if it's caused by my water. I will perform water tests tomorrow to check (among other tests) my phosphates and nitrates. The last time I made product water, I had a feeling that my RO/DI unit was producing product water too quickly, so I'm suspecting a water quality issue may be the culprit. I will be purchasing a new DI cartridge and an inline TDS meter to help with the water issue, and I'll know more after some water testing.

My sump and skimmer are still noisy. The waterfall from the overflow and skimmer is not as bad since I played around with some acrylic sheets, but it still can be distracting. My AquaC Remora has produced almost no skim which I am not sure is because there is a low bio load or because the skimmer is unhappy. The water fall of the sump's baffle and the skimmer's return are creating micro bubbles that the return pump is efficiently chopping up and sending to the display. My Koralia powerhead is then sending the bubbles throughout the tank (I have plans to help rectify this very soon). I am still very happy with the Sunlight Supply TekLight and the Giessman bulbs I am using. The color is amazing.

The livestock are adjusting well. The yellow watchman goby and coral banded shrimp have picked their homes and are eating well. They seem happy and comfortable. My coral are adjusting mostly well with the exception of the Blasto's; they have yet to fully come out again.

My clownfish (who is in quarantine) is doing well. I see spots kind of come and go, but they don't appear to be signs of ich. I have treated using Ruby Reef products. Whatever the problem, it seems to come and go. If I continue to see it, I'm going to switch over to a true ICH/Parasite medicine or copper treatment, but I try to avoid the hard stuff if it's not necessary. (I'll talk more about my clownfish later.)

I was given a sump (another sump), so that will be my project for the weekend. The sump is larger and will be a little better suited for the size of my aquarium, I just need to find some acrylic sheets to add some baffles for a bubble trap. I'm leaning towards a new skimmer as well- I really want an AquaMaxx skimmer, but the vertical clearance of my tank stand limits my skimmer choice. The best find for the price is looking like a Reef Octopus Needwheel skimmer.

So that was week number one. Lot's more to come.

Saturday, March 19, 2011

TrueLumen Pro Led Strips

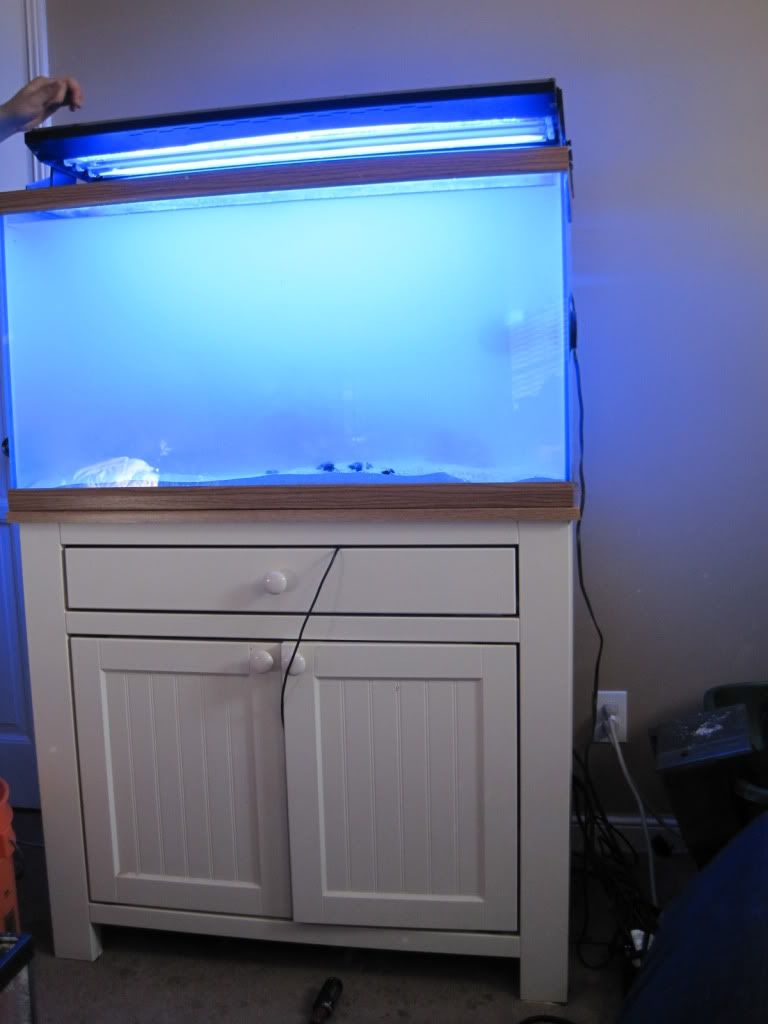
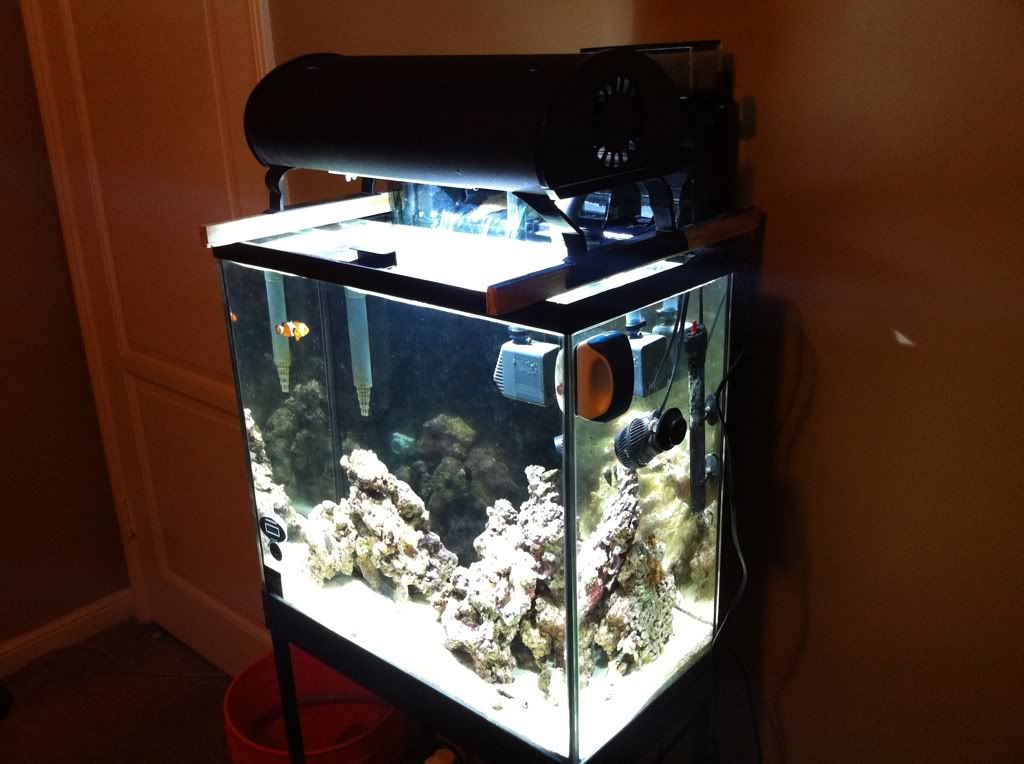
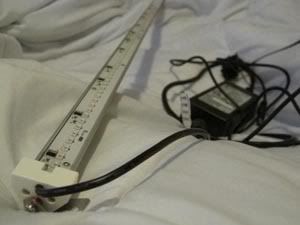
Working in the marine aquarium industry has some amazing perks! Yes, I get to talk about something I enjoy all day with customers, and I get to work with a bunch of other "fish nerds." More importantly, though, I get to hear about and see new products. Sometimes, I even get to play with them! This week I was allowed to take home and test a Current-USA TrueLumen Pro LED Strip. I brought home the 36" TrueLumen Pro LED Strip Light, Deepwater Actinic Blue 453nm. The Specifications from the manufacturer (CurrentUSA) are posted below.


Model: Description: Dimensions: Max Power Consumption: Max Number of strips per 1x60w transformer:
3027 36" TrueLumen Pro LED Strip Light, Deepwater Actinic Blue 453nm 36" x 0.8" x 0.7" 23 watts 2
3036 60 watt 24 Volt Power Transformer - - -

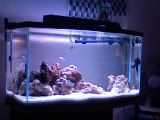
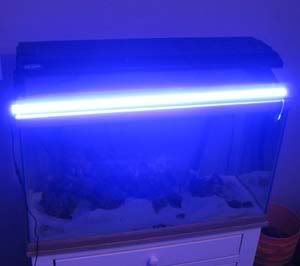
The LED is BRIGHT. I tried to take some pictures, but apparently my photography skills have failed me. It's difficult to capture the intensity of the lighting and accurately compare the brightness to that of my t-5 lighting.

Current USA claims the light is expected to improve coral growth, but with the exception of a one liner on the instruction sheet that came with the LED light, I have been unable to find other written claims in regards to that matter. I would love to know if these fixtures are intense enough to be used as a stand alone lighting systems. I expect to see some tests and more information from others, and from the looks of it, I wouldn't be surprised if the LED lights could be used in multiple quantities to grow coral. (*Disclaimer: I don't have PAR meters or any other testing devices.)

What I have seen so far is a cool running LED that provides intense lighting. For fish only or FOWLR aquariums, there is no doubt that one or maybe two of these LED strips would be more than plenty of light. The fixture is built well and comes with 180 degree rotating mounting brackets and screws, so the fixture can be mounted almost anywhere. I'm going to keep it running on top of my tank as a dusk and dawn light; I will have it come on about an hour before and turn off about an hour after my t-5 lights shut off. I'm excited to see what this new LED is made of!

Stay tuned! I will keep you posted on the TrueLumen Pro LED strips, and my next update will include information from one week after the big switch from the 18 to the 60.

Sunday, March 13, 2011

The 60 gallon is here!!! Tada!

draining the tankIt's been a long afternoon, but It's finally here. My lovely girlfriend / assistant helped me out quite a bit today and yesterday to prepare for the switch. She helped run the RO/DI unit and make water for me in advance, she helped me mix the salt, and today she helped me haul buckets inside. The job today didn't take as long as we had expected, but it took some planning and strategy to pull the job off... and it helped to have a great assistant...

temporary holding tankFirst, I set to drain the 18 gallon tank. I drained the water into a rubber maid tote and placed the live rock, coral, and my fish in the bucket. I left the heater and a power head flowing. You can see in the picture that I placed the rock in and separated the coral into a baskets. I've lost coral doing projects like this before, so I had to make sure I could keep the coral safe and easy to find.

Empty tankAfter draining the aquarium, it was time to rinse off the 60 gallon aquarium and bring it in the house. We used a level to try to get the aquarium to sit as level as possible. The floor is higher closer to the wall, so I used some scrap pieces of wood to shim the front of the tank. This worked out okay, but it left the front just a little bit higher than the back. I will have to use some ultra thin shims to level the back out just a tiny bit. We arranged the tank, and after three failed attempts to situate it so there would be enough access for the CPR overflow box, we had it set. I put the overflow box on the back and set the sump in the stand.

Stacking rockNow it was time to put the live sand from the 18 gallon and add 30 pounds of new aragonite. I added the live stuff first, and added the new aragonite on top. I started on the aquascape and added the live rock. I don't think I have quite enough, but the shape of the rock came out pretty cool. I like to go for the look where it's off a little bit to one side, and doesn't look like it was meant to be stacked. It's probably the only artist instinct I have... and it's not very good. I'll probably purchase some good base rock and add to the pile within the near future. In the picture, you can see that I used a bucket lid to help keep the sand in place while I added buckets of water.

Full and cloudyAnd the worst part: adding the water. One 5-gallon bucket at a time. It was a long process. My great helper, Mal, helped me out quite a bit. Sometime she lugged buckets in, and we got into a good routine of me lugging and pouring, and she would fill the buckets up so they would be ready when I had finished one. The routine worked rather well, and it went faster than I had imagined. That doesn't mean it was a fun or easy project- it wasn't. It did go by quicker than anticipated though, and for that, I am very grateful. Laddies and gents- get a good helper! :) In the image, you can see the tank is full, and I have placed the light fixture on. We're almost done.

So here's the specs of the new tank:
+ 60 gallon aquarium. 36" L (footprint of a 40 gallon breeder).
+ Used sump. Probably 10 gallons or so. It's going to be giving me trouble as I am terrified that it will overflow.
+ Taam Rio return pump
+ CPR overflow kit w/ Aqualifter pump
+ Sunlight Supply tech light. 4x 36" - 39 watt t-5 bulbs. D-D Giesemann Powerchrome T5 High Output Fluorescent Bulbs. 3x Actinic+ and 1x AquaBlue Plus. I wanted a blue look, and so far it looks amazing. My coral are fluorescing, and I'm seeing colors I never knew were in my corals.
+ Koralia 4 powerhead. (I had it laying around). Will be considering an mp10 or 2x Koralia Evolutions hooked up to my Reef Keeper Lite.
+ Digital Aquatics Reef Keeper Lite. Basic model. Head unit with one PC4. Currently controlling my heater, lights, and return pump. I'm definitely going to add a PC4 to the setup.
+ AquaC Remora (w/ drain fitting) being run with a rio pump. It works, but it's really noisy as the water is pouring into the sump. I need to do something about this quick. I wedged some acrylic pieces I had under the water flow to help keep it from splashing directly into the sump, and it helps a little, but it's driving me nuts.


Sump and skimmerCPR overflowFirst run


Some people might ask, so I'll tell you that the aquarium and stand were given to me by my lovely girlfriend, and I purchased most of the above from friends, however I also purchased the bulbs, my salt mix, my RO/DI filters, and other items from MarineDepot.com. Couldn't be happier with my purchases and freebie aquarium.

Everything is still a little cloudy, but I had to add everyone in. I drip acclimated everything and back in everything went. So far so good. I will definitely need to add some wood under the shelve in the tank stand for some extra support, and I will need to upgrade the sump soon. It wasn't designed as a normal sump, and it gets right up to the edge; this makes me very nervous and worried about overflows. I will need to get a check valve for the return line as well.
Overall though, it's been a good day, and I am glad I could take this opportunity to set up a new system. I will post updates soon, and I will document the progress as it comes along. Until next time...

The 18 Gallon Nano

18 gallonleftCloser view


My current aquarium is an 18 gallon nano reef. I will list the specifications below:

Equipment:
AquaClear 70 - mechanical filtration. Basket is filled with live rock rubble. Have added carbon for periods of time and filter floss.

AquaC Remora - protein skimmer.

Hydor Koralia Nano - water flow.

Marineland Stealth Heater - controlled with DA RKL.

CurrentUSA SunPod - 70watt MH fixture w/ moon lights. 70 watt Ushio, 14000k bulb.

Digital Aquatics Reef Keeper Lite (basic) - controller. Currently only controlling heater and light timer.

Shrimp
Inhabitants:
Lightly stocked at the moment- Yellow Watchman Goby, Coral Banded Shrimp, clean up crew. Corals include: Frogspawn, Blasto's, Australian Duncans, Montipora, and other coral. I have had issues keeping clownfish, and I am beginning to suspect that my shrimp is not helping the situation. I currently have a new True Percula Clownfish in quarantine, awaiting to be introduced into the 60 gallon after it's up and ready.

Husbandry and Maintenance:
Weekly water changes of about 4 gallons using DD H2Ocean salt. Levels have been maintained primarily using water changes. I have added Seachem's Reefusion 2 part dosing solution as a Calcium / Alkalinity dosing solution and ReefPlus amino acid solution. I test my levels weekly using API reef and saltwater master test kits.

Well, that's the 18 gallon in a nut shell. The next post will include the build of the 60 gallon, which I am currently preparing for as I post this... Until next time.

Thursday, March 10, 2011

In the beginning

My reef log will be covering the build of my 60 gallon reef tank, but this post will focus on my aquariums humble beginnings.

29 gallon - day 1
My first attempt(s) at a marine aquarium was a 29 gallon followed quickly after by a move to a 46 gallon FOWLR aquarium. The aquarium (or first two I guess) failed in part to my lack of money and lack of proper equipment. I tried some coral towards the end, but with poor filtration and not enough lighting, I wasn't having much luck. I learned some important lessons, and I was not deterred from the hobby by any means.


46 gallon
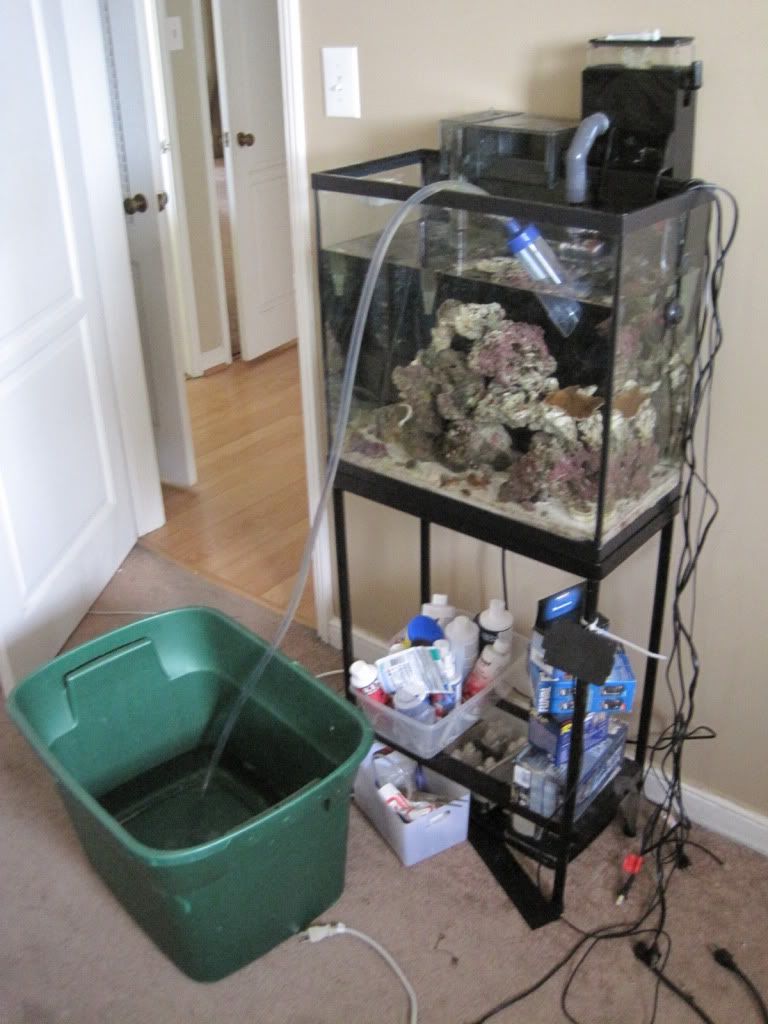
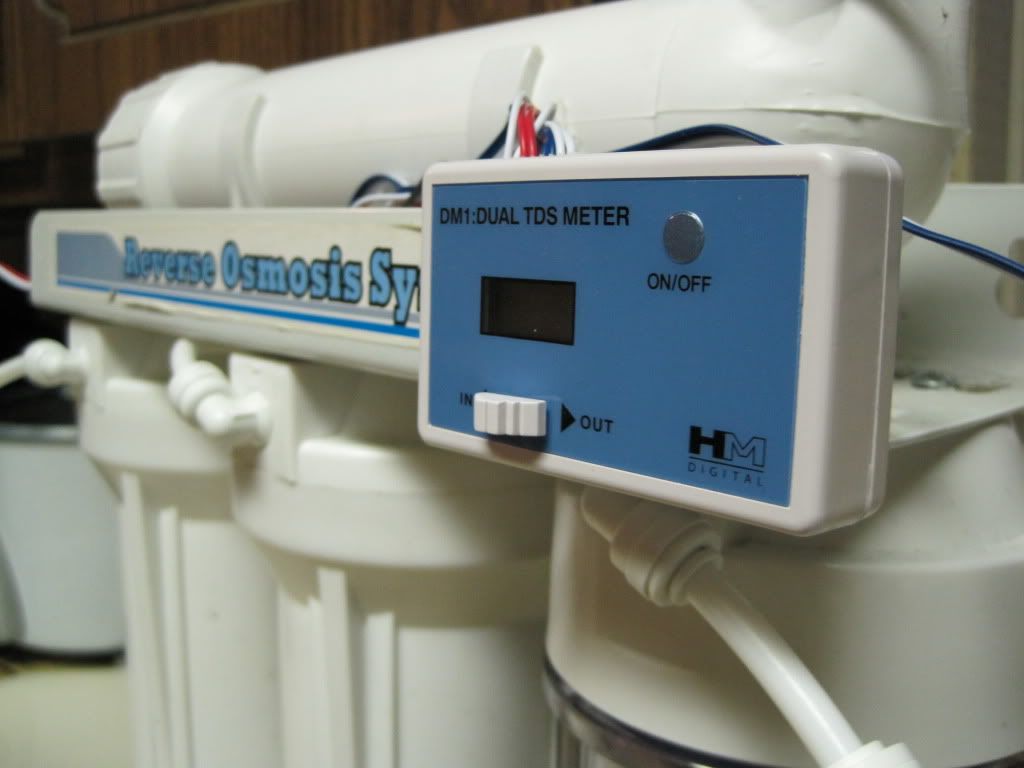
I downgraded to a much more manageable 8 gallon biocube as I figured the maintenance would be much more manageable. It was easier to preform water changes and I was able to keep some soft corals and some small fishes. The tank did well but crashed during the summer months, and rebounded after. It was easier to preform water changes (up to this point, I am purchasing saltwater from LFS's). Difficulty finding replacement bulbs and my displeasure with the DIY modifications to the hood (i purchased the tank used) left me feeling uneasy with the aquarium, so I purchased a light fixture and a 10 gallon aquarium and made the move. This aquarium survived and thrived, but getting RO/DI water and saltwater from my LFS was getting harder and hard with my schedule. 8 gallon biocube
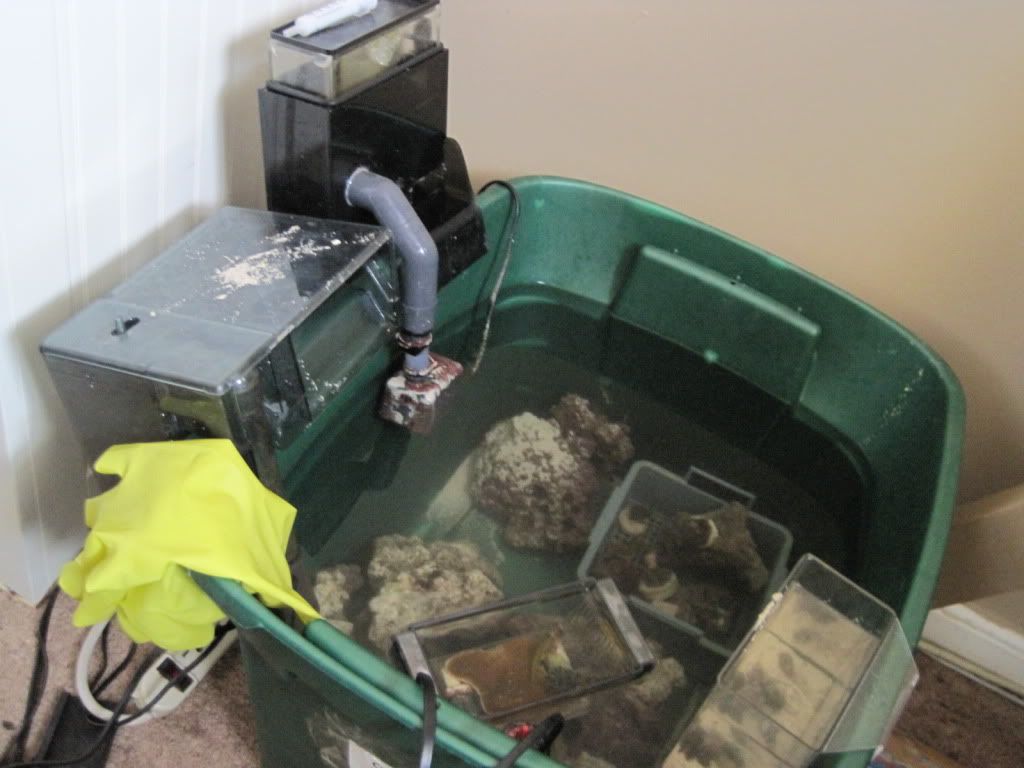
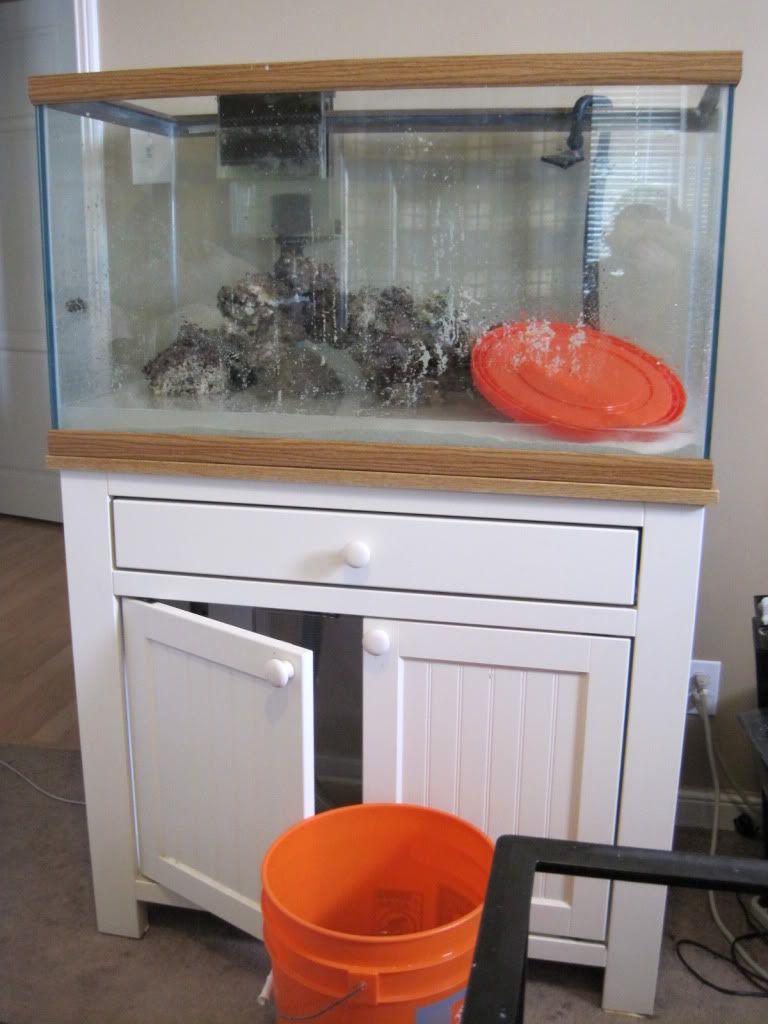
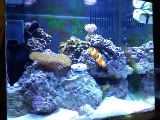
I topped off using tap water (carbon filtered, but still tap water) and the water changes were far and few between. The tank developed algae problems and eventually declined. The aquarium also developed a leak, so I knew it was time to change. I was also in the progress of painting, so it was a perfect time to 1) break down my freshwater aquarium, 2) move the nano reef, and 3) convince myself that it was time to upgrade. The reef itch (a very contagious and often incurable disease) struck...

I decided to get serious again. In November 2010, I purchased an 18 gallon aquarium from a LFS with plans of a future upgrade. I added more live rock and let my surviving coral and fishes get comfortable in the new environment. Thanks to my friends, I acquired a protein skimmer and a small metal halide fixture for my aquarium. With these very important tools, I began my journey towards SERIOUS reef keeping; this is no longer a Nemo focused tank.

My next blog update will feature specific details of my current reef aquarium and hopefully some pictures. Until next time...

Sunday, March 6, 2011

Welcome to my reef log!

A reef log - a reef blog. A reblog? Maybe not... I've decided to jump on the blog bandwagon after a coworker suggested I start documenting the progress of my tank. I will post information, photographs, and other information I feel relevant to my reef aquarium.

Let me introduce myself: My name is Chris. I am a twenty-something years old aquarium hobbyist. I have worked in the fish and pet industry for over six years. I have dabbled in the care and keeping of reptiles, pocket pets, dogs and freshwater and marine fishes. I will clearly state that I am a hobbyist, I am not an expert in anything. I am not a researcher, I am not a scientist, and I am learning more and more every day. I will use my reeflog to track developments and progress as I develop my aquarium. As with any blog, all information posted (unless otherwise stated) is strictly my opinion, and I am in no way claiming to be an authority on anything.


My reef log will focus primarily on my next build, a 60 gallon reef tank. I will be moving my 18 gallon nano reef tank (and all of its inhabitants) shortly. I will document the set-up of the aquarium and the growth and development. Keep checking back for updates... In my next post, I will introduce my current 18 gallon nano, and will begin the transfer process shortly.