Dear readers,
My domain name (ChromisReef.com) has expired and will not be renewed.
After nearly a decade in the aquarium hobby and industry, I have temporarily (or possibly permanently) left the hobby to partake in other things in life that I enjoy (like keeping my money in my pocket, not my tank- WOOOAAA ZING!).
It has been fun sharing about my aquarium, tested products and new exciting products on the market. Without this blog, I may have lost interest much sooner.
I'd like to say thank you to my visitors that helped motivate me to post about whatever product or tank change I made. Also, while I received no monetary assistance from manufacturers, I'd like to send special thanks to the great teams at Marine Depot and PetStore.com for linking to my blog, providing me with products to test, and other assistance. Kudos to you guys!
Going forward, I will leave this site at it's hosted address: http://chromisreef.blogspot.com
Please feel free to browse around. I hope my few pages help you on your journey and help get someone into (or further into) the great world of freshwater and marine aquariums.
Thanks again, and keep on reefing!
Until next time,
Chris "Chromie" R.
ChromisReef.com

Showing posts with label marine depot. Show all posts
Showing posts with label marine depot. Show all posts
Thursday, July 17, 2014
Thursday, July 12, 2012
Sneak Peak - Maxspect Razor R420R LED!
 I got to take a look at the newest LED fixture from Maxspect. The Maxspect Razor R420R LED Light Fixture is an impressive lady. Sleek, thin, attractive. Can be mounted on the aquarium using the included mounting legs, hung from the ceiling or from hanging arms, or using the Maxspect mounting system. It's quite versatile.
(More information and images after the jump!)


Sunday, November 13, 2011
New frags from Garrett's Acropolis
I got to see something really special today; Garrett's Acropolis. Steve was kind enough to show us his impressive coral propagating system. Located outdoors, his system utilizes natural light and under 600 watts of electricity to run! It's a beautiful system, with healthy, beautiful, and a good variety of rare corals.
I opted for some easier to keep acros, green slimer, a monti, and a birds nest (Ora birds of paradise) coral. I also got a blue Xenia frag!
You can see some great pictures of Garrett's Acropolis featured on Marine Depots Featured Tank for July 2011. Marine Depot also posted a video to their YouTube channel. I've posted it below:
You can also view more on Garrett's Acropolis on his official website at www.garretts-acropolis.com.
Finally, here's some pictures of my tank and the new frags (Taken with my iPhone, sorry. I'll get some with the DSLR soon).Until next time...


I opted for some easier to keep acros, green slimer, a monti, and a birds nest (Ora birds of paradise) coral. I also got a blue Xenia frag!
You can see some great pictures of Garrett's Acropolis featured on Marine Depots Featured Tank for July 2011. Marine Depot also posted a video to their YouTube channel. I've posted it below:
You can also view more on Garrett's Acropolis on his official website at www.garretts-acropolis.com.
Finally, here's some pictures of my tank and the new frags (Taken with my iPhone, sorry. I'll get some with the DSLR soon).Until next time...
Friday, October 28, 2011
Reef A Palooza 2011
I stopped by the 8th Annual Reef A Palooza show/event this past weekend in Costa Mesa, California. Reef A Palooza is an aquarium trade show promoted by the Southern California Marine Aquarium Society (SCMAS). RAP isn't so much a trade show as it is an indoor marketplace where sellers, exhibitors, and hobbyists of all meet to sell, trade, or show off their products. This was my first year visiting RAP, and I was not disappointed.
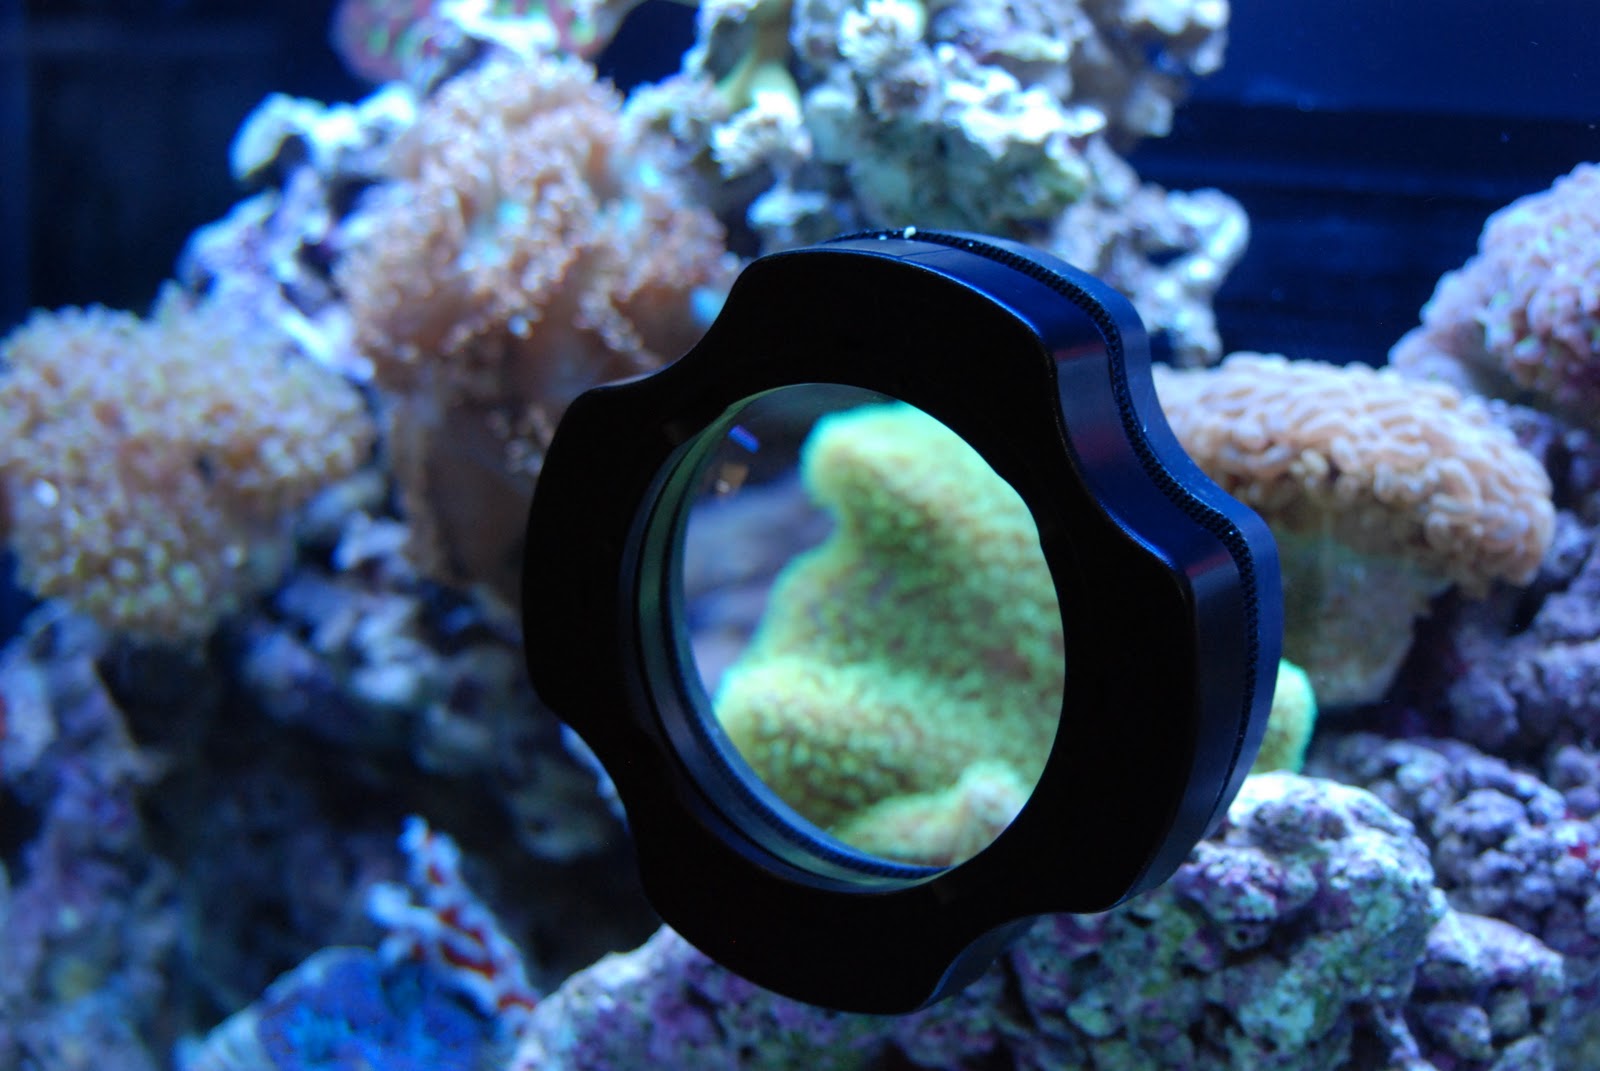
I got to see some nice coral, fish, and displays. There was a wide variety of vendors, big and small, online and brick and mortar. Marine Depot, an online retailer, had a large booth shared with Innovative Marine. A spin of the wheel at the Marine Depot booth offered the opportunity to pick up a prize. While you were at the booth, you could check out some of the hottest products in the market such as Innovative Marine Aquariums, Ecotech Marine Radion LED light fixtures and Vortech Pumps, the Kessil 150W led fixture, Mr. Aqua frameless tanks, AquaticLife T-5 lighting, and Orphek Power Reef LED fixtures to name the biggest attractions. Another popular hit was the Innovative Viewing Systems Portal on a Red Sea Max aquarium. This was a show stopper for sure.
Other vendors featured their products. AquaticLife had a large booth featuring their lighting systems, and Ecoxotic introduced their new Panorama PRO fixture. The new Panorma PRO fixtures are said to offer stronger lighting for deeper aquariums than the first generation fixtures, and the price point is said to be competitive with other fixtures. This fixture is definitely something to keep an eye out for, and I'm anxiously waiting for the fixtures to roll out completely.

On the additives side, industry giant Seachem was present to showcase their large line of supplements including their premium Aquavitro line. Additive and supplement company, Aqua Vision Aquatics, had a booth featuring their wide range of products. Aqua Vision Aquatics offer a nice bang for your buck, and feature supplements with updated formulas to meet the needs of the modern reef aquarium.
Industry blog leaders such as ReefBuilders and Reef Addicts were also among the booths. The show also had many great speakers in the speaking room providing information on a wide range of topics.
Reef A Palooza was a small, but fun show. Their were over 70 exhibits and an estimated 3000 visitors over two days! This local show has potential for growth, and I imagine an even greater show next year at Reef-A-Palooza 2012!!
Be sure to check out Marine Depot's Facebook page for some pictures of their booth and other great pictures from Reef-A-Palooza 2011!
 |
| Red Sea MAX 250 - Silver |
 | |
| Creative Idea: IKEA light fixture w/ a PAR38 LED bulb |
Other vendors featured their products. AquaticLife had a large booth featuring their lighting systems, and Ecoxotic introduced their new Panorama PRO fixture. The new Panorma PRO fixtures are said to offer stronger lighting for deeper aquariums than the first generation fixtures, and the price point is said to be competitive with other fixtures. This fixture is definitely something to keep an eye out for, and I'm anxiously waiting for the fixtures to roll out completely.
 |
| 4" Innovative Viewing Systems Portal |
On the additives side, industry giant Seachem was present to showcase their large line of supplements including their premium Aquavitro line. Additive and supplement company, Aqua Vision Aquatics, had a booth featuring their wide range of products. Aqua Vision Aquatics offer a nice bang for your buck, and feature supplements with updated formulas to meet the needs of the modern reef aquarium.
 |
| Ecoxotic Panorama Pro LED Fixture |
Industry blog leaders such as ReefBuilders and Reef Addicts were also among the booths. The show also had many great speakers in the speaking room providing information on a wide range of topics.
Reef A Palooza was a small, but fun show. Their were over 70 exhibits and an estimated 3000 visitors over two days! This local show has potential for growth, and I imagine an even greater show next year at Reef-A-Palooza 2012!!
Be sure to check out Marine Depot's Facebook page for some pictures of their booth and other great pictures from Reef-A-Palooza 2011!
Wednesday, August 24, 2011
Bioplastics Reactor Giveaway!!!
I love giveaways, I'm a huge fan of MarineDepot.com, and I really like my Two Little Fishies PhosBan 150 reactors, so I wanted to share this:

Until next time...

MarineDepot.com is giving away a Two Little Fishes NPX Bioplastics Reactor 150 with 200ml of NPX media (as seen on ChromisReef.com (and all over the web)). Your chances to win are pretty good; so far, there have only been about 25 posts. I'm not much of a gambling man, but the odds are in your favor! All you have to do is visit the Marine Depot Forums and post a comment in the Official Giveaway Thread.
Marine Depot provided the following information about the giveaway:
"Our staff receives alot of questions about biopellets, zeovit, prodibio, etc. so we started a new section in our forum to cover these topics: Probiotics and Labile Organic Carbon Dosing. It is moderated by Murray Camp (About Murray).
We are doing a giveway to bring awareness to the new forum. The winner of the giveaway will receive a Two Little Fishes NPX Bioplastics Reactor 150 with 200ml of NPX media.
There is no purchase necessary to enter. U.S. residents 18 and over merely need to post something into the official giveaway thread to be eligible. On September 19, a potential winner will be chosen randomly and contacted with a private message (PM) on the forum. They potential winner will have 14 days to reply to claim your prize. Entires are limited to one per person."
Go sign up! Take a look around. The moderators on the Forums are great: they are extremely knowledgable, helpful, and much nicer than moderators on some other well known forums. You can enter to win a cool product and learn something along the way!
Until next time...
Friday, July 8, 2011
"Beat the Heat" with Marine Depot

My friends at MarineDepot.com are having a Beat the Heat Summer Giveaway (link to Facebook). There is no purchase necessary to enter. Hobbyists need only to sign-up for the Marine Depot Email Newsletter during the months of July or August 2011 to be eligible. Current subscribers (like myself) are automatically entered into the giveaway! (Visit MarineDepot.com for contest rules.)
First prize is an UP Aqua 4-Row Flexible Aquarium Cooling Fan and a hydra Glass Hang-on Thermometer. Visit MarineDepot.com for more information.
Thursday, June 16, 2011
Summer Time

Unfortunately, I've had poor luck with my old nano reef tanks during the summer. My first reef tank crashed when I went to Las Vegas. My next reef tanks followed suit. I have had poor luck whenever I have left town for more than two or three days. Asking someone to care for my reef tank is a possibility, but even then I worry. This summer, I plan on leaving for one full week. While I have taken many smaller trips for camping, we haven't been able to take a whole week off for several years. To make things more complicated, my dad is going out of town, so I have no one home to check on the tank.
I have some good things going for me this time. I have the assistance of automation. I can set up an auto top off system to control evaporation. I will leave my window fan running in my bedroom to circulate the heat on hot days, and I will set up fans on the sump to assist with cooling. I can set up a large bucket to collect excess skim, so I won't need to worry about the skimmer cup overflowing. Lighting is also on timers, so I won't have to worry about lighting cycles.
My last concern is feeding. While I can feed my coral before I leave, I will need to obtain an automated fish feeder. I will also test my automated system for 1-2 weeks before the trip. This will allow me to monitor my system to ensure it works flawlessly, and work out any kinks. I will also have to train someone or ask a fellow hobbyist to come by halfway through the week to check on things.
And finally, I may have to set up a remote webcam so I can keep an eye on the tank. While it won't be overly sophisticated, I purchased a webcam off eBay for $0.01. I can set-up a simple webcam system to upload snapshots to the internet. This can give me a change to spot a problem (or prevent a problem) and call my standby person.
I'm sure I'll document this process, but I wanted to kick around some ideas first.
Thursday, May 5, 2011
VorTech MP10w ES
The quest to build my 60-gallon reef tank continues! As time progresses, I have made a mental wish list of upgrades awnd add-ons. An area that needed an urgent upgrade was water flow. Detritus was accumulating on top of and behind the rock work, and using only one power head was not providing sufficient flo.
There are many great options for water flow for every need and budget, but I wanted something controllable and powerful. I narrowed down my choices, and after weighing my options, I decided on the Ecotech Marine VorTech MP10w ES Propeller Pump. Well, not just one, I chose two.


Step one: Open The box. Inspect the contents. Drool… Okay, don’t drool… You don’t want to damage the driver or the dry side.


Step eight: Choose desired operational modes. Set desired programming. For this step, I would recommend using the user manual: it goes into more detail. If you are using more than one pump, you will need to sync your wireless drivers, and designate master and slave pumps before selecting modes.


The VorTech MP10w ES is simple and sleek. It is designed for aquariums from 2.5 – 50 gallons and has a flow rate of 200 to 1575 gallons per hour. A MP10 can accommodate aquarium glass up to 3/8 inch. (Is your tank larger, or glass thicker? No problem! Ecotech offers the MP40 (for aquariums 50-500 gallons) and the MP60 (120-1000+gallons). There’s a VorTech pump for everyone.)
Vortech pumps now are available in a "wireless" configuration. The wireless designation can cause confusion; there are still wires. The wireless aspect refers to the driver's ability to find other wireless units and sync the pumps. This allows for more than one pump to run the same operational mode.
MP-10w Specifications:
Flow: 200 to 1575 gph (750 -5962 lph)
Power Consumption: 8 to 18 watts
Maximum Tank Thickness: 3/8″ (9.5mm)
Appropriate Tank Size Range: 2.5 to 50 gal (9.5 -190L)
Dimensions: Wet Side- 2.5″ diameter by 1.5″ long (63.5mm x 38.1mm),
Dry Side – 2.5″ diameter by 2″ long (63.5mm x 50.8mm)
Clearance Needed Behind Aquarium: 2.25″ (57mm)
Power Consumption: 8 to 18 watts
Maximum Tank Thickness: 3/8″ (9.5mm)
Appropriate Tank Size Range: 2.5 to 50 gal (9.5 -190L)
Dimensions: Wet Side- 2.5″ diameter by 1.5″ long (63.5mm x 38.1mm),
Dry Side – 2.5″ diameter by 2″ long (63.5mm x 50.8mm)
Clearance Needed Behind Aquarium: 2.25″ (57mm)
The pump build reflects quality, and Ecotech Marine backs their product with a 1 year warranty. The pump includes everything you need to completely install your Vortech. The kit includes cable mounts (and zip ties) and even Velcro to attach the driver to your stand.
The Vortech pump was easy to install. The directions included are easy to follow for setup, however I recommend downloading a copy of the full user guide when it comes to programming. The full user guide is also simple to follow, but goes into step-by-step instructions. I found these instructions were helpful for first time programming.
Step two: Clean any algae from the mounting service. You may also want to clean the outside of the glass (tip: use RO/DI water and some paper towels).
Step three: Apply the rubber gasket (not needed for 1/4” or 3/8” glass) and cord mounting tabs.
Step four: Place the VorTech motor upon the black gasket (if used) and secure the cord using the mounting tab. Per the Quick Start Guide, “The cord must be positioned upwards so that if the VorTech were to fall off the aquarium, it does not swing and damage your aquarium or pump.”
Step five: Attach the wet side. I used the included foam pre filers.
Step six: Mount the driver unit wherever desired.
Step seven: Plug everything in. Turn on to constant mode and turn speed control know to maximum. You can check alignment at this time. Move the wet side slightly (up, down, left, right) to minimize vibration.


Step nine: Grab a tasty beverage and enjoy the work of art that is your aquarium. You may now safely drool.
Sunday, March 13, 2011
The 60 gallon is here!!! Tada!
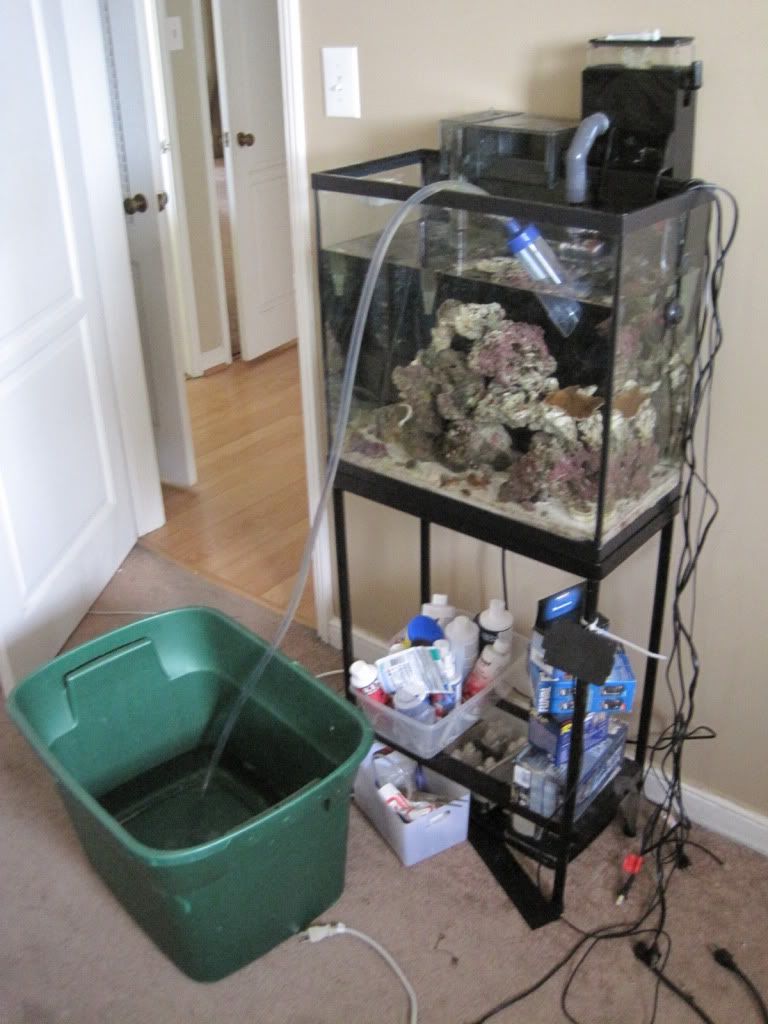 It's been a long afternoon, but It's finally here. My lovely girlfriend / assistant helped me out quite a bit today and yesterday to prepare for the switch. She helped run the RO/DI unit and make water for me in advance, she helped me mix the salt, and today she helped me haul buckets inside. The job today didn't take as long as we had expected, but it took some planning and strategy to pull the job off... and it helped to have a great assistant...
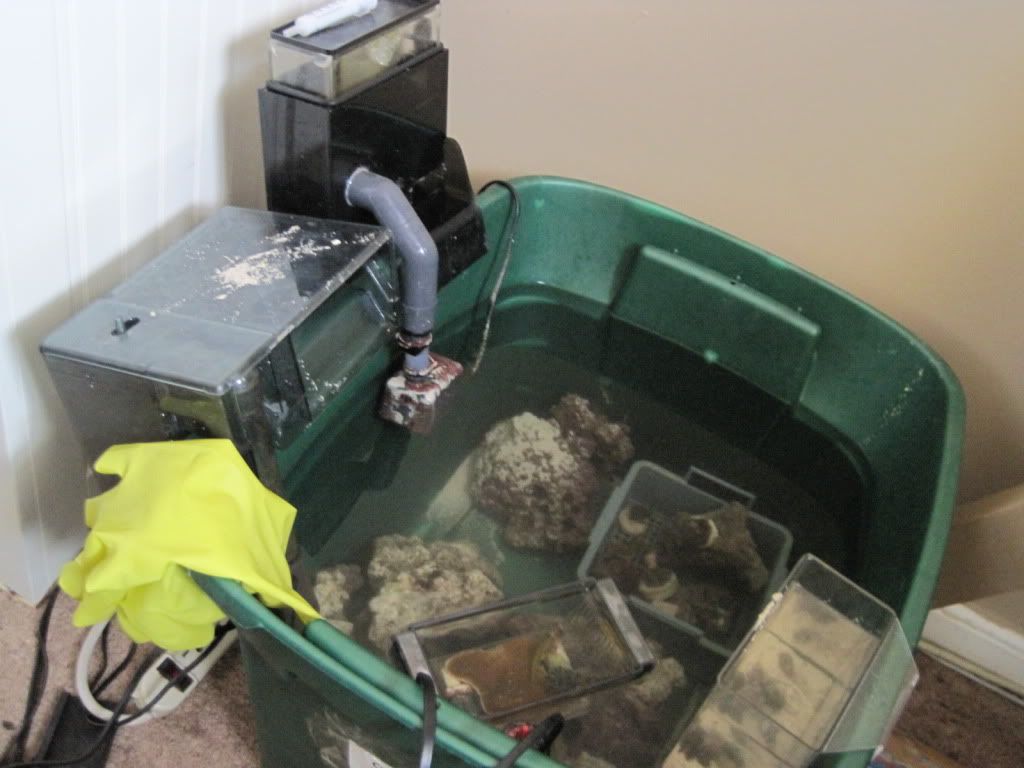 First, I set to drain the 18 gallon tank. I drained the water into a rubber maid tote and placed the live rock, coral, and my fish in the bucket. I left the heater and a power head flowing. You can see in the picture that I placed the rock in and separated the coral into a baskets. I've lost coral doing projects like this before, so I had to make sure I could keep the coral safe and easy to find.
  After draining the aquarium, it was time to rinse off the 60 gallon aquarium and bring it in the house. We used a level to try to get the aquarium to sit as level as possible. The floor is higher closer to the wall, so I used some scrap pieces of wood to shim the front of the tank. This worked out okay, but it left the front just a little bit higher than the back. I will have to use some ultra thin shims to level the back out just a tiny bit. We arranged the tank, and after three failed attempts to situate it so there would be enough access for the CPR overflow box, we had it set. I put the overflow box on the back and set the sump in the stand.
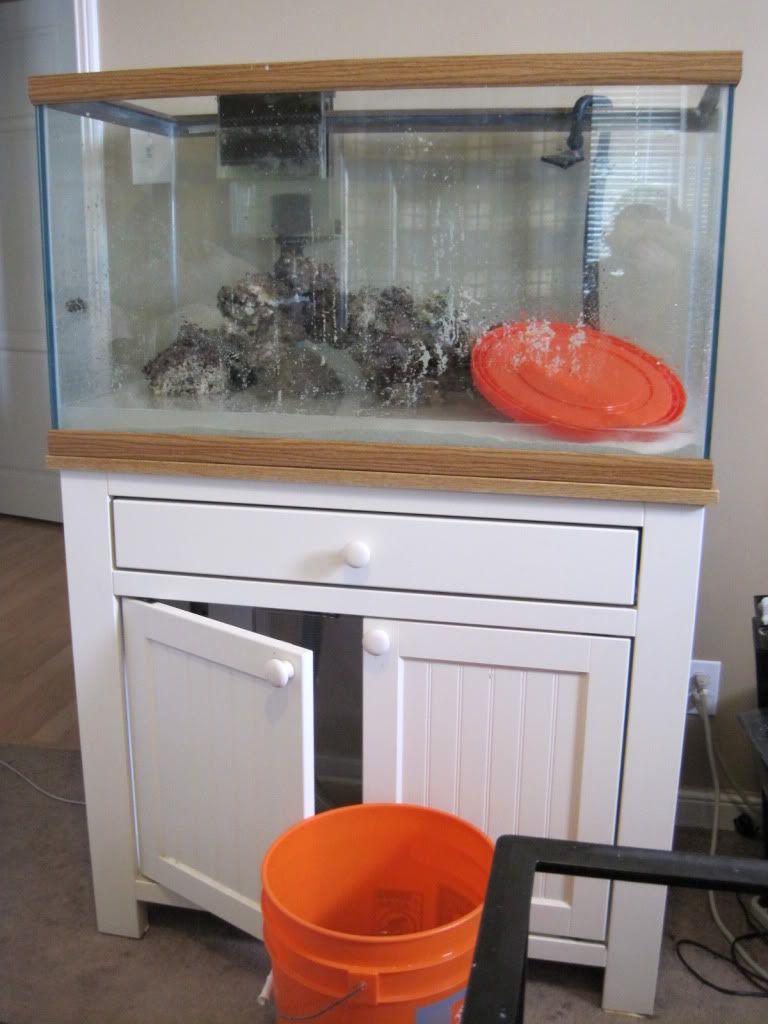 Now it was time to put the live sand from the 18 gallon and add 30 pounds of new aragonite. I added the live stuff first, and added the new aragonite on top. I started on the aquascape and added the live rock. I don't think I have quite enough, but the shape of the rock came out pretty cool. I like to go for the look where it's off a little bit to one side, and doesn't look like it was meant to be stacked. It's probably the only artist instinct I have... and it's not very good. I'll probably purchase some good base rock and add to the pile within the near future. In the picture, you can see that I used a bucket lid to help keep the sand in place while I added buckets of water.
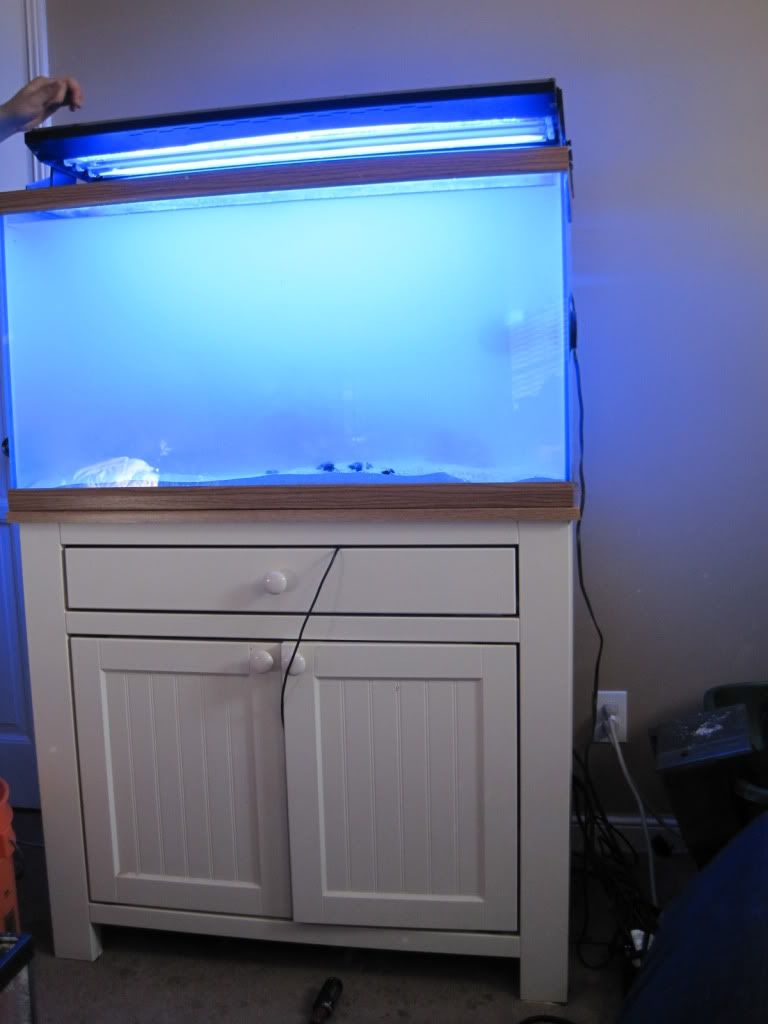 And the worst part: adding the water. One 5-gallon bucket at a time. It was a long process. My great helper, Mal, helped me out quite a bit. Sometime she lugged buckets in, and we got into a good routine of me lugging and pouring, and she would fill the buckets up so they would be ready when I had finished one. The routine worked rather well, and it went faster than I had imagined. That doesn't mean it was a fun or easy project- it wasn't. It did go by quicker than anticipated though, and for that, I am very grateful. Laddies and gents- get a good helper! :) In the image, you can see the tank is full, and I have placed the light fixture on. We're almost done.
So here's the specs of the new tank:
+ 60 gallon aquarium. 36" L (footprint of a 40 gallon breeder).
+ Used sump. Probably 10 gallons or so. It's going to be giving me trouble as I am terrified that it will overflow.
+ Taam Rio return pump
+ CPR overflow kit w/ Aqualifter pump
+ Sunlight Supply tech light. 4x 36" - 39 watt t-5 bulbs. D-D Giesemann Powerchrome T5 High Output Fluorescent Bulbs. 3x Actinic+ and 1x AquaBlue Plus. I wanted a blue look, and so far it looks amazing. My coral are fluorescing, and I'm seeing colors I never knew were in my corals.
+ Koralia 4 powerhead. (I had it laying around). Will be considering an mp10 or 2x Koralia Evolutions hooked up to my Reef Keeper Lite.
+ Digital Aquatics Reef Keeper Lite. Basic model. Head unit with one PC4. Currently controlling my heater, lights, and return pump. I'm definitely going to add a PC4 to the setup.
+ AquaC Remora (w/ drain fitting) being run with a rio pump. It works, but it's really noisy as the water is pouring into the sump. I need to do something about this quick. I wedged some acrylic pieces I had under the water flow to help keep it from splashing directly into the sump, and it helps a little, but it's driving me nuts.
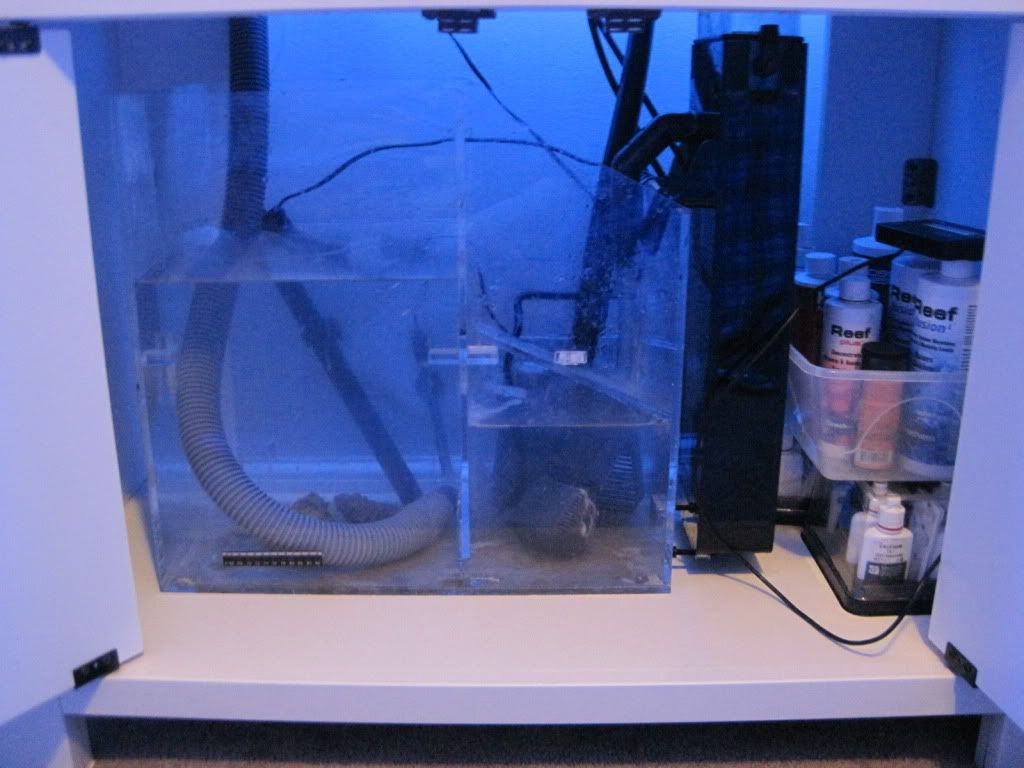
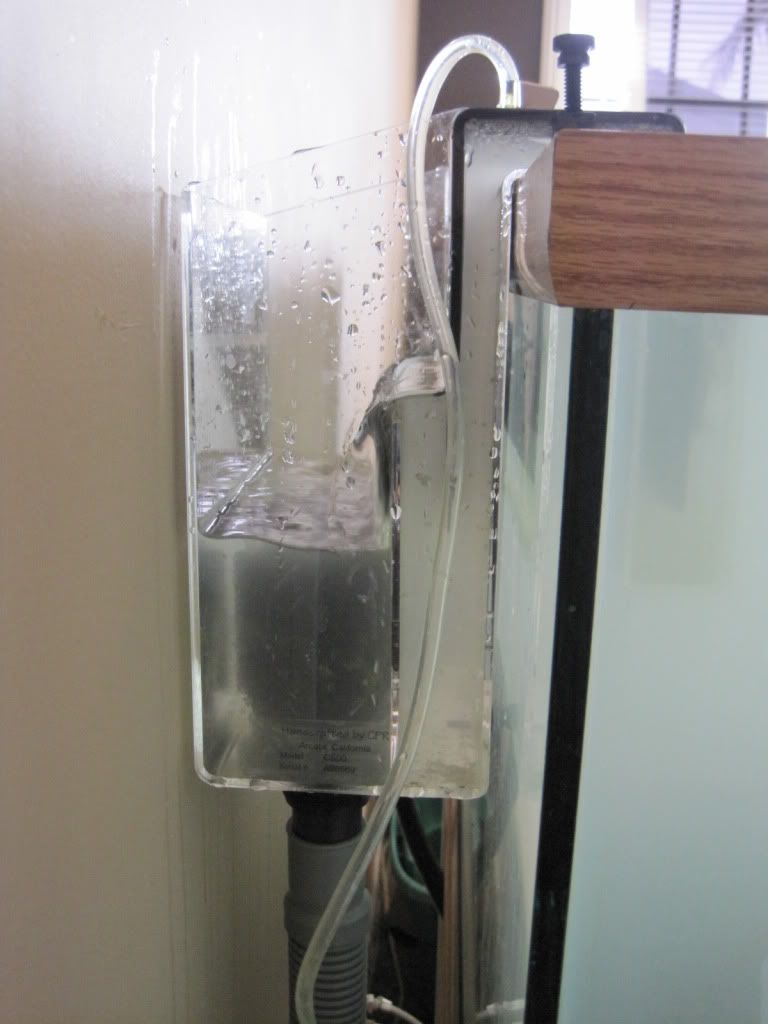
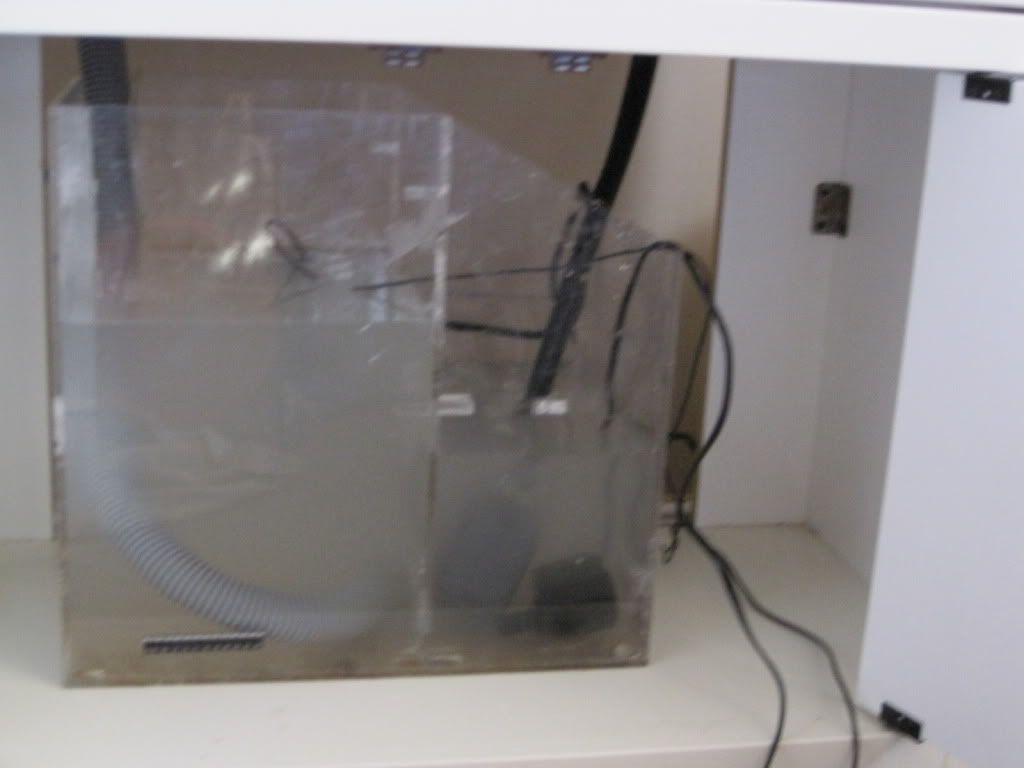
Some people might ask, so I'll tell you that the aquarium and stand were given to me by my lovely girlfriend, and I purchased most of the above from friends, however I also purchased the bulbs, my salt mix, my RO/DI filters, and other items from MarineDepot.com. Couldn't be happier with my purchases and freebie aquarium.
Everything is still a little cloudy, but I had to add everyone in. I drip acclimated everything and back in everything went. So far so good. I will definitely need to add some wood under the shelve in the tank stand for some extra support, and I will need to upgrade the sump soon. It wasn't designed as a normal sump, and it gets right up to the edge; this makes me very nervous and worried about overflows. I will need to get a check valve for the return line as well.
Overall though, it's been a good day, and I am glad I could take this opportunity to set up a new system. I will post updates soon, and I will document the progress as it comes along. Until next time...
Subscribe to:
Posts (Atom)